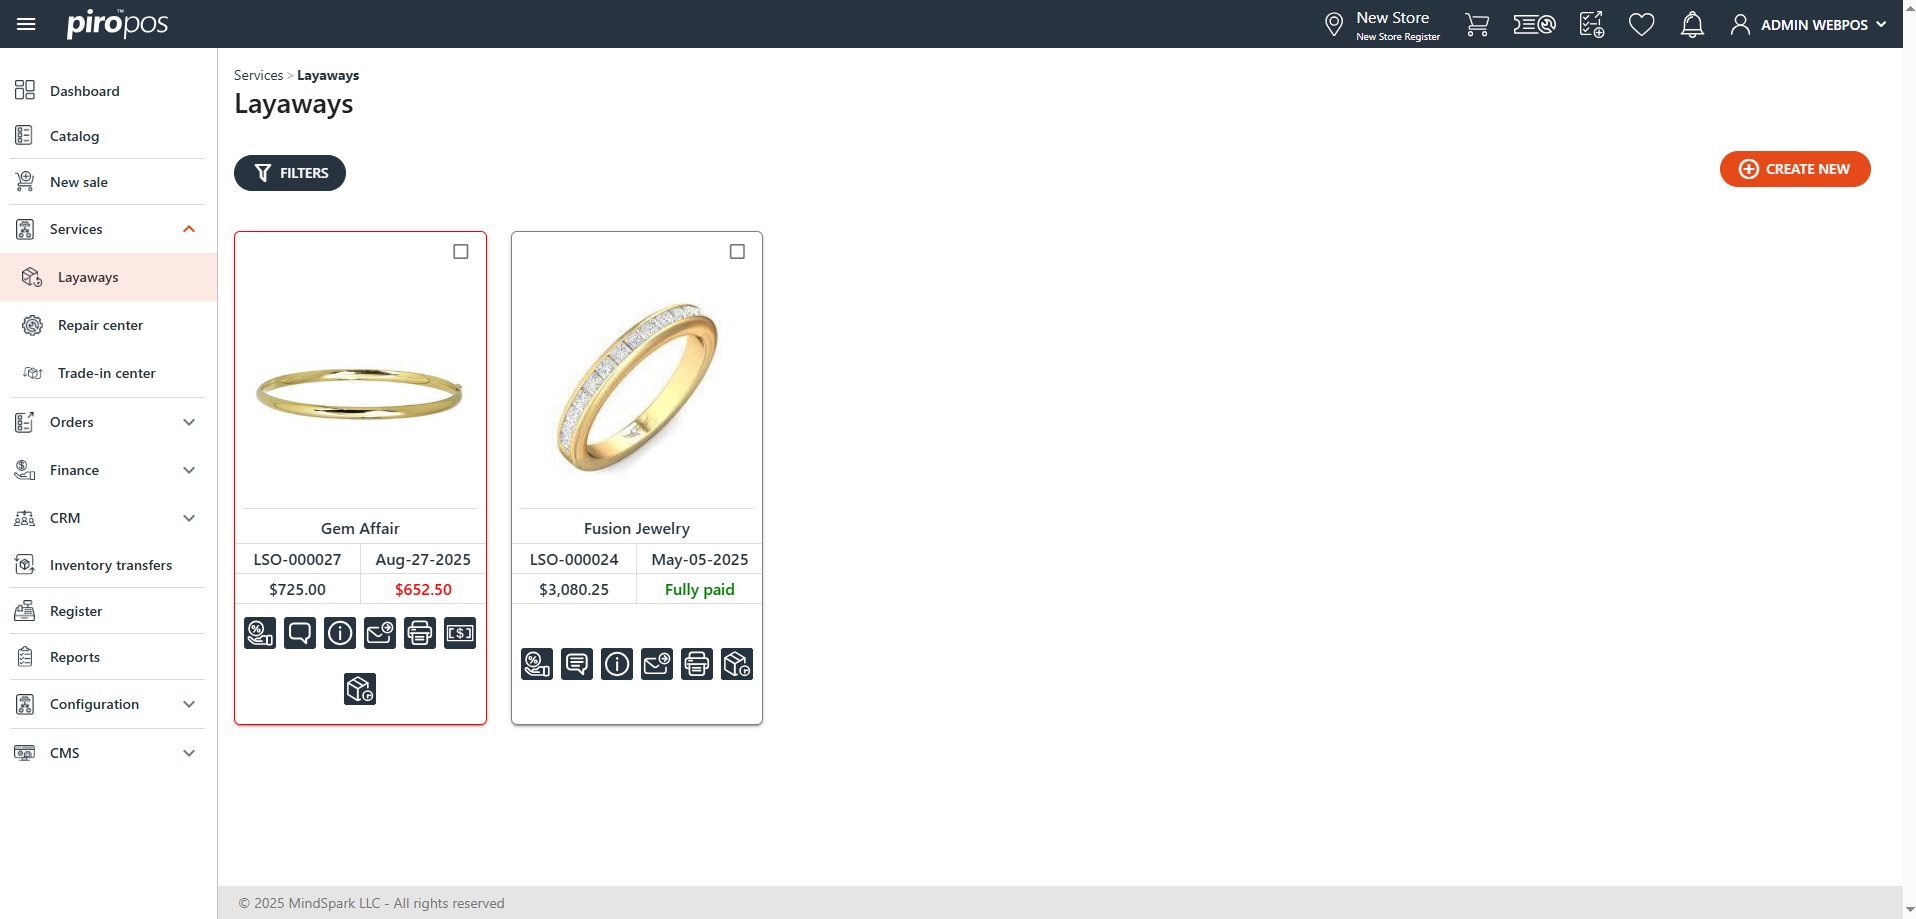
The Layaways submodule allows you to take a deposit for a product by reserving it, and let the customer pay for it later in installments. All previously created layaways appear as cards when you open the module:
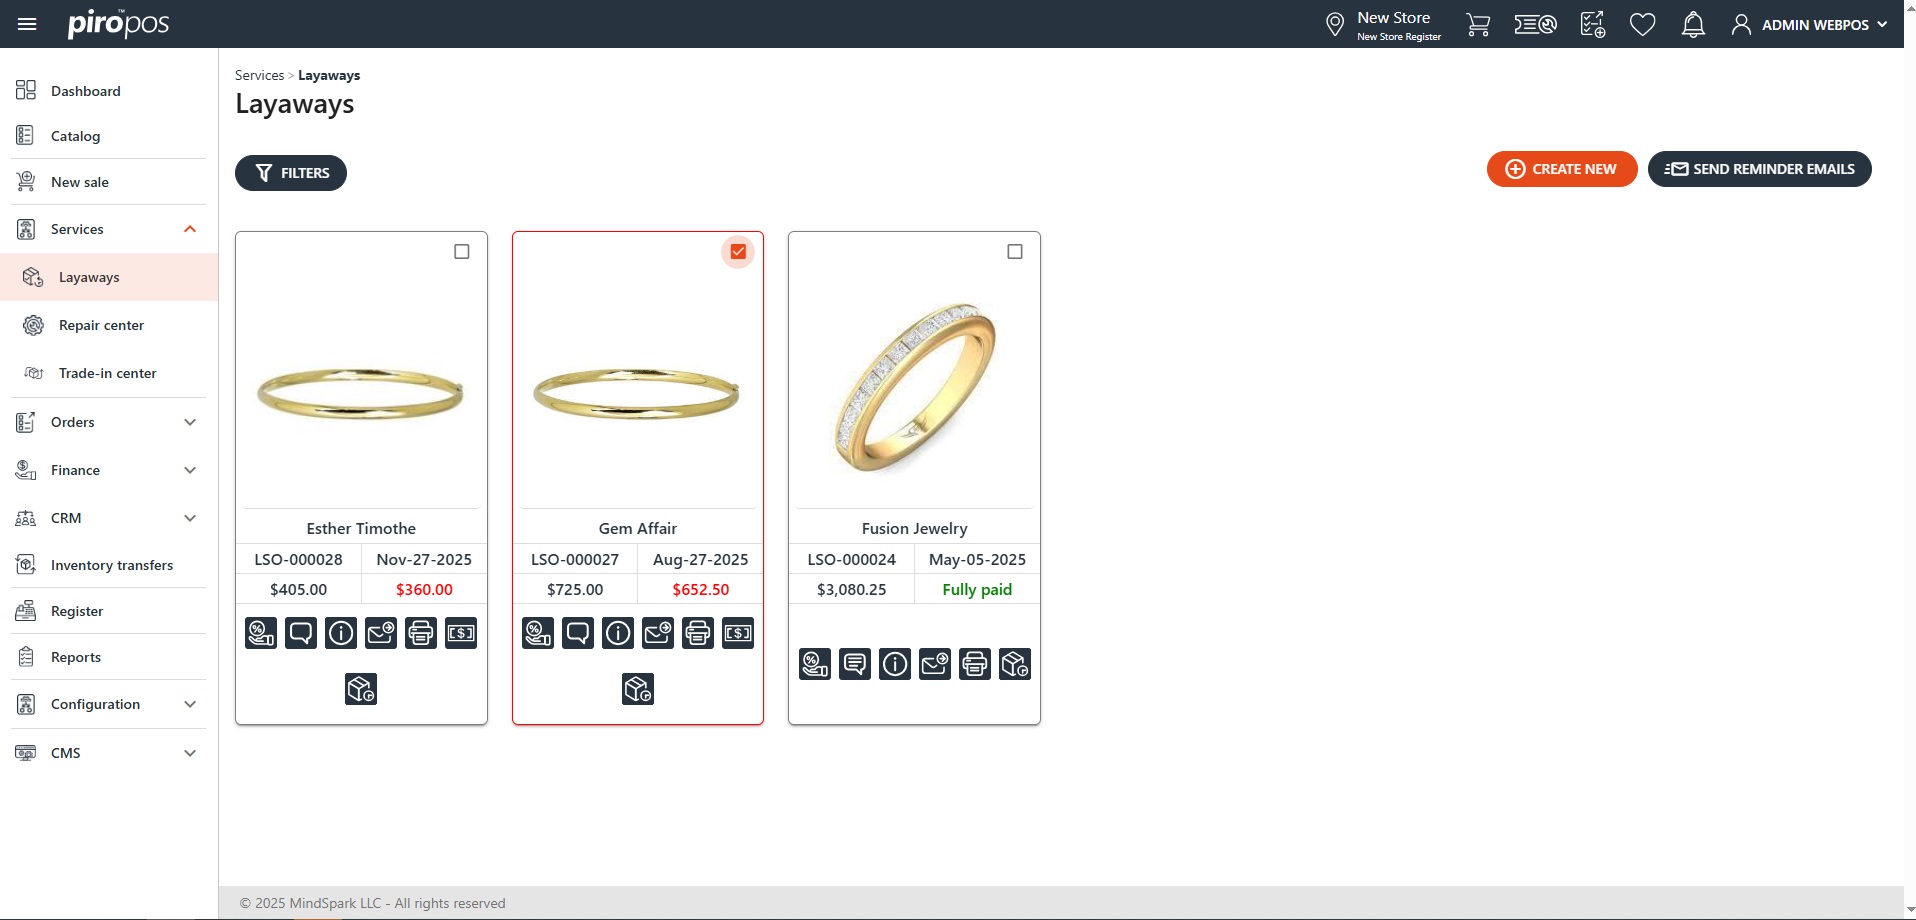
The red frame indicates the layaway has an outstanding balance. The user can send out a reminder emails about these by choosing the SEND REMINDER EMAILS button on the page appearing after clicking the check-box the upper-right corner of the card:
The icons at the bottom of a card lets you to:
- Enter sales commissions
- Add a note
- View the layaway order details
- Send an email
- Print a receipt, invoice or statement
- Add a new payment
- View the layaway’s installment details.
If you’re searching for a specific layaway, use the FILTERS button above the cards. You can filter by customer, period, interval, layaway number, invoice number or item type. Click the Show only unpaid layaways radio button to view unpaid layaways: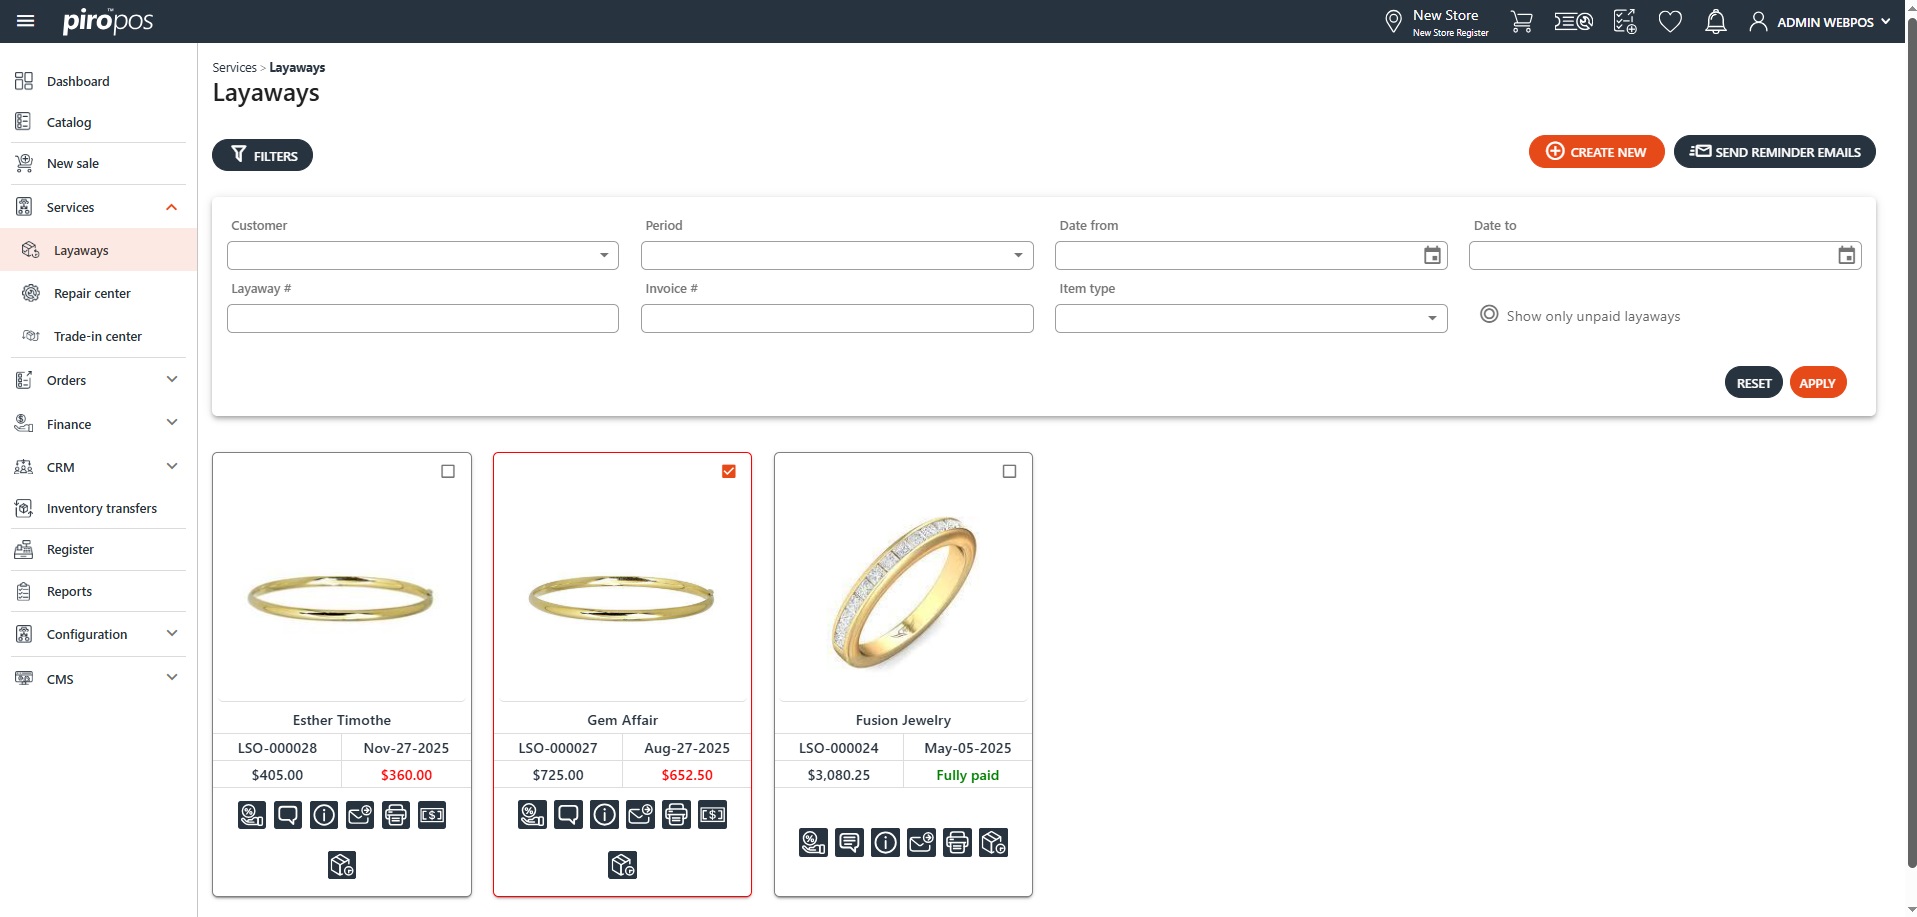
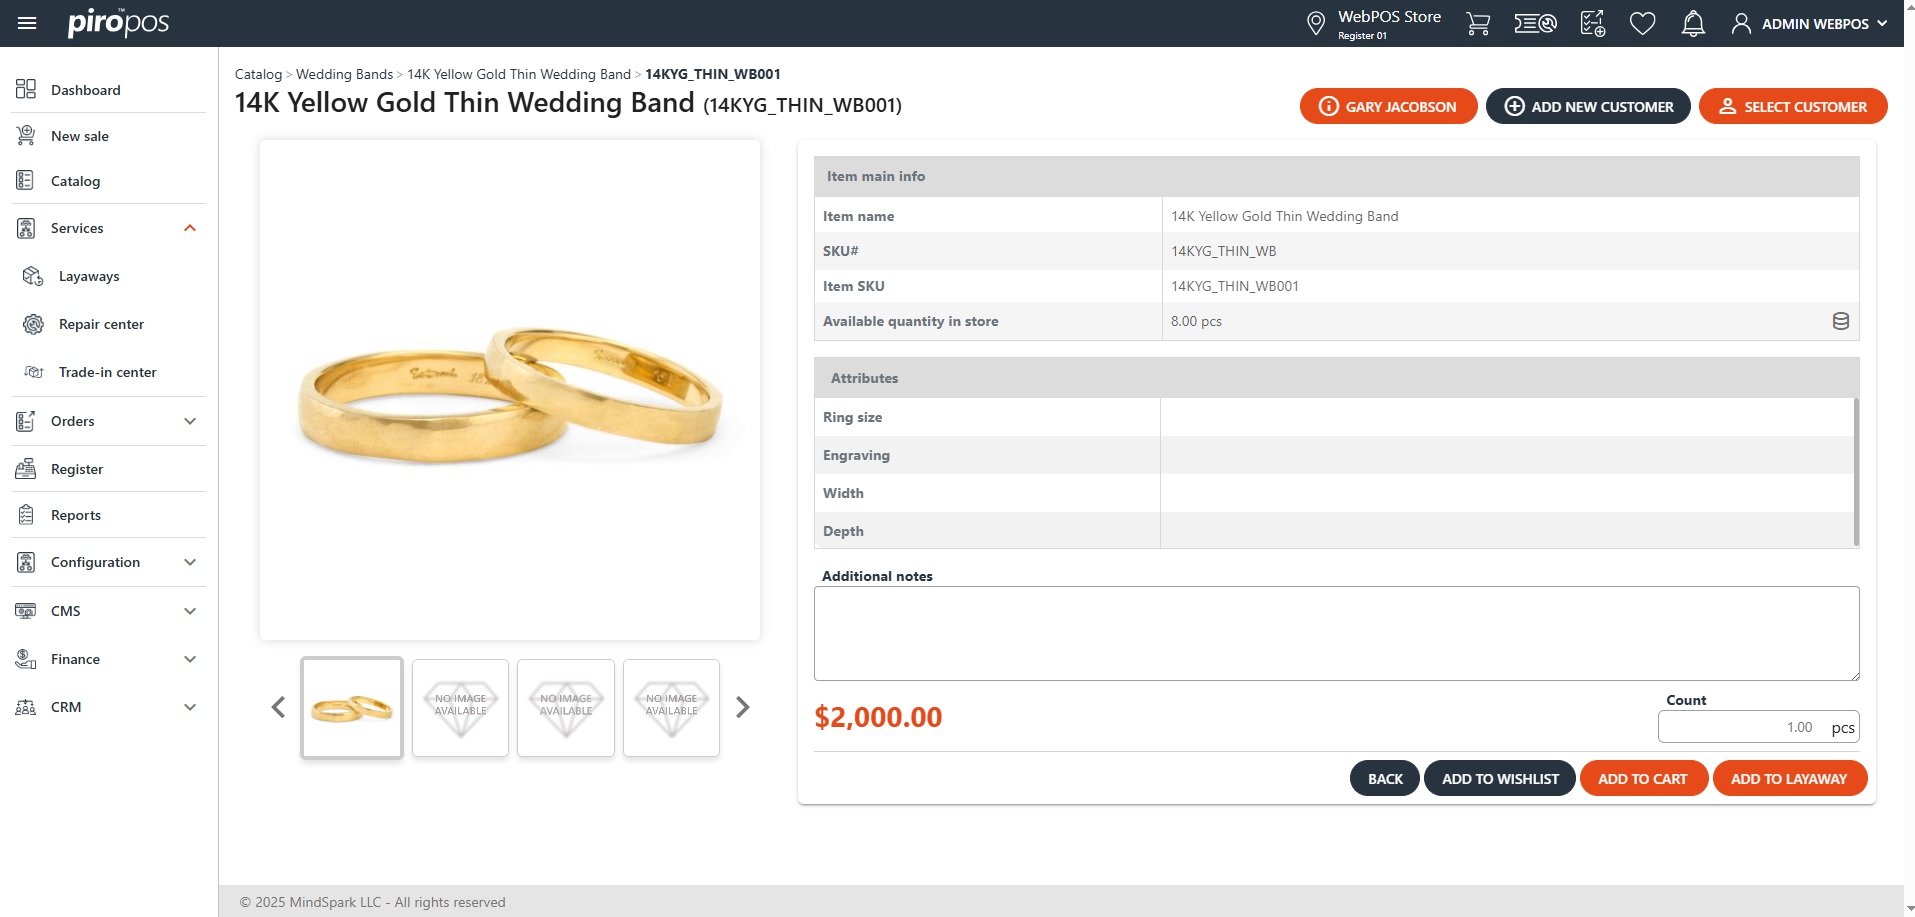
Creating a new layaway is similar to creating a catalog order: the items can be added from the catalog, by scanning it, by manually entering the inventory item code or selecting an item type.
Select the ADD TO LAYAWAY option directly from the catalog item:
Similar to new sales, the payment type for a layaway deposit can be selected by clicking the Charge button. Next, select a payment term and click the PAY button.
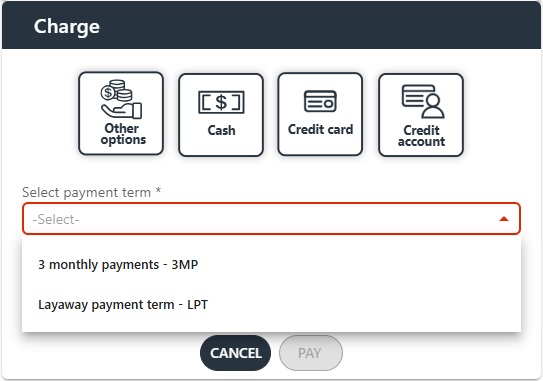
NOTE: These payment terms are configured in the backoffice system, check this article for configuring it:
Backoffice Configuration – Payment Term for Layaways
Based on the selected payment plan, the system will calculate the minimum deposit amount and display the number of installments for the selected plan. Click the PAY button to take the deposit. Completed transactions can be viewed in the Payments module.
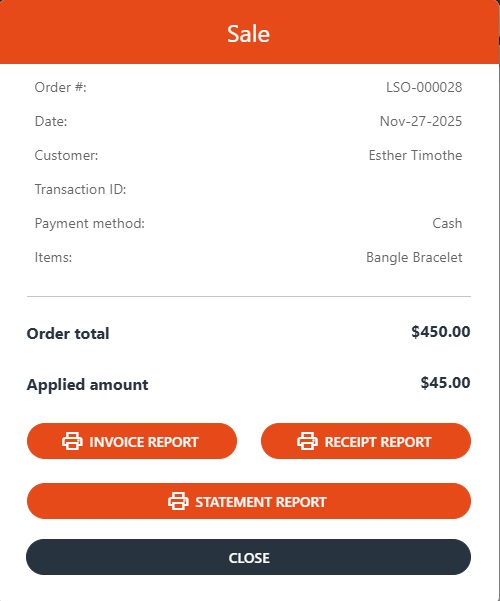
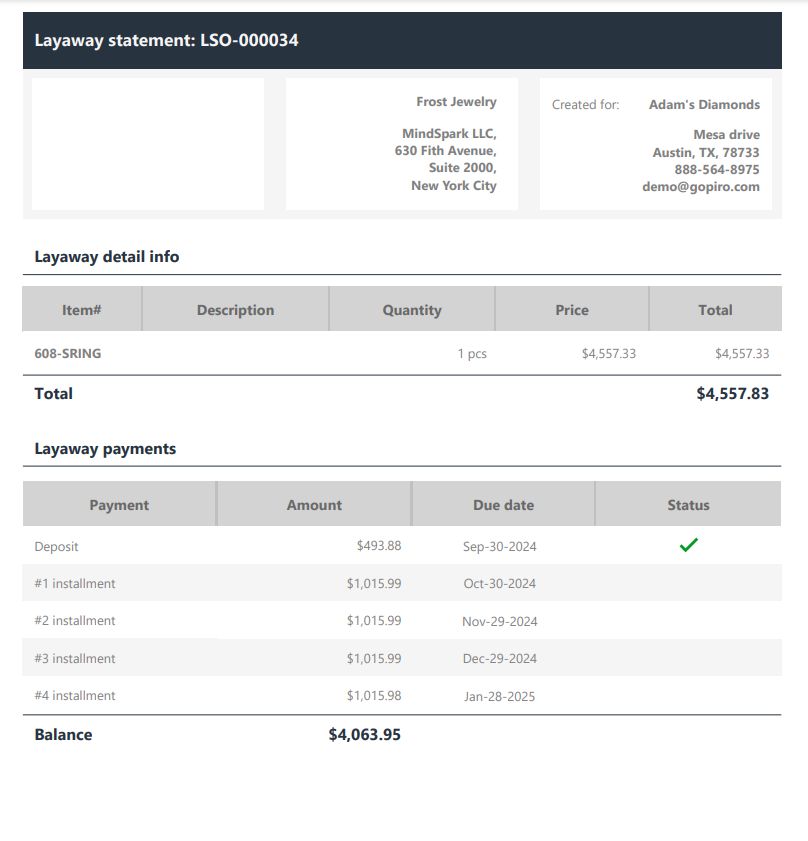
Immediately can you obtain a layaway STATEMENT REPORT from the SALE dialog or lately from the layaway order card by choosing the Print icon and choose the last option. This report shows the layaway Due date, the Deposit, and the schedule of remaining installments: