
The Consignments submodule displays all existing outgoing consignments listed in a grid. New consignments can be created from the New sale page, and there are three ways to add an item to a consignment:
- Scan the item’s barcoded tag using the SCAN ITEM option from here
- Manually enter the Item SKU number (inventory number) into the ITEM CODE search field on this page
- Choose the item type from the ITEM TYPE drop-down on this page
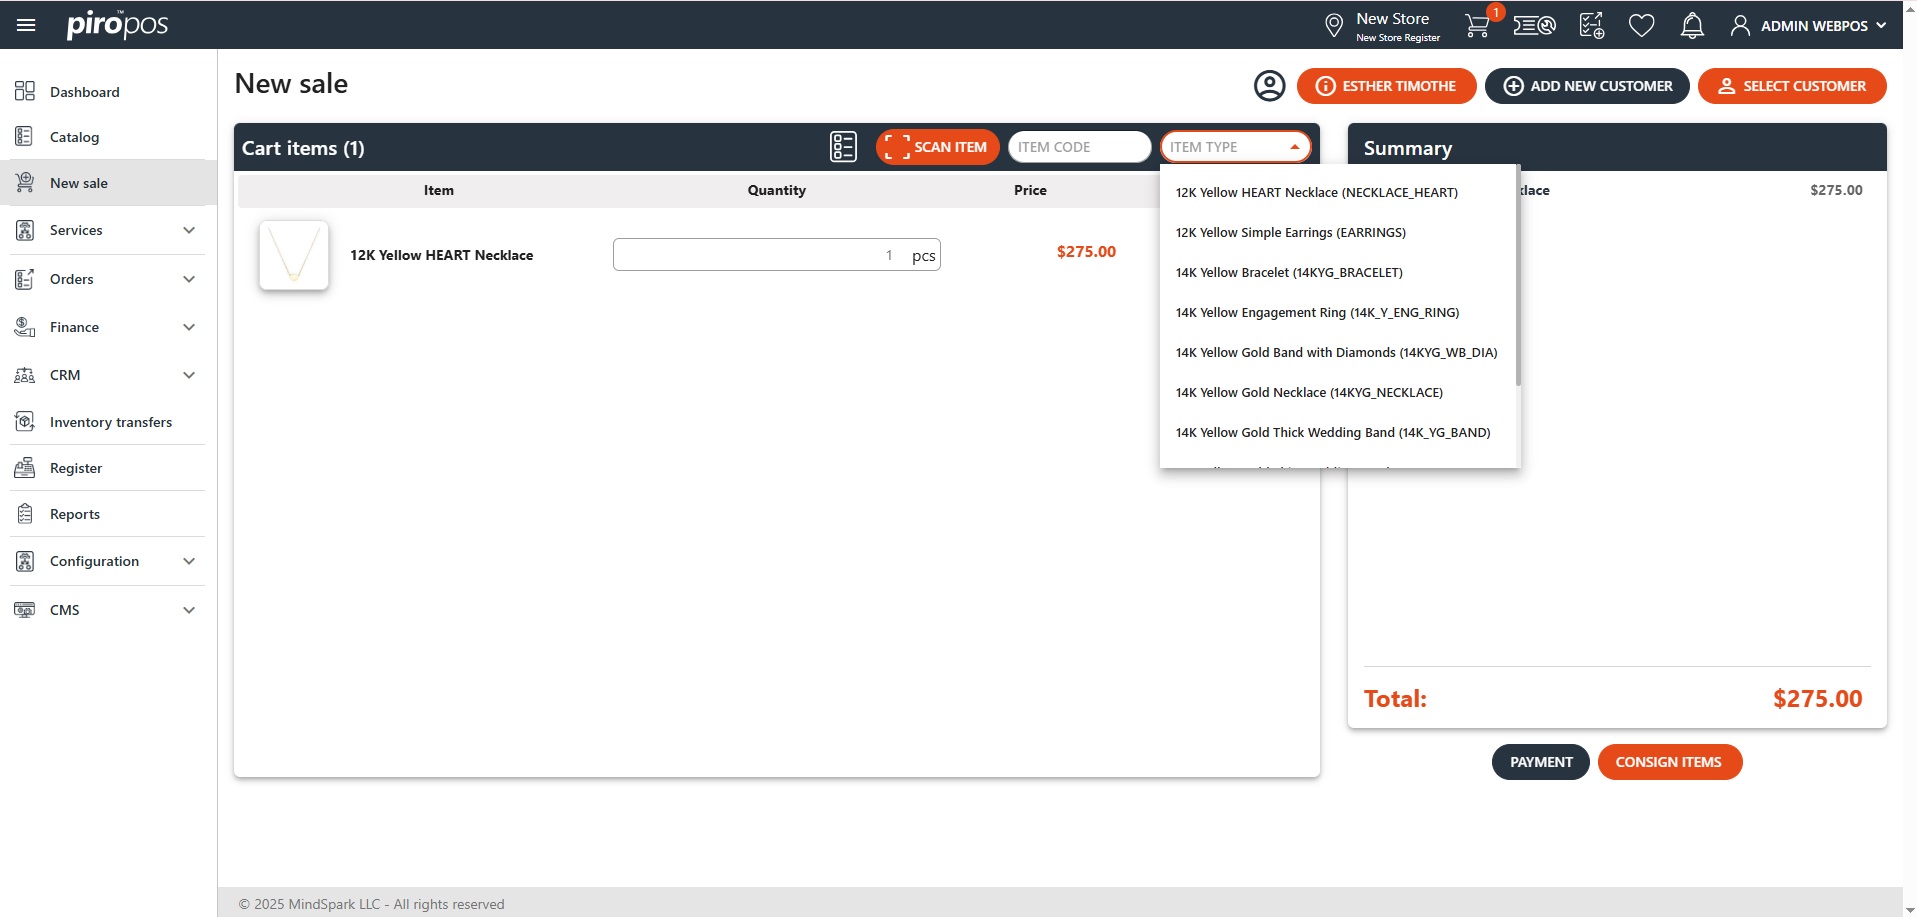
The selected item(s) will appear in the Summary as separate rows, displaying the items images, names, quantities, and prices:
Only the item’s quantity is editable inline. Additionally, you can delete the item or add it to the Wishlist from the main cart screen – this action will remove it from the summary window.
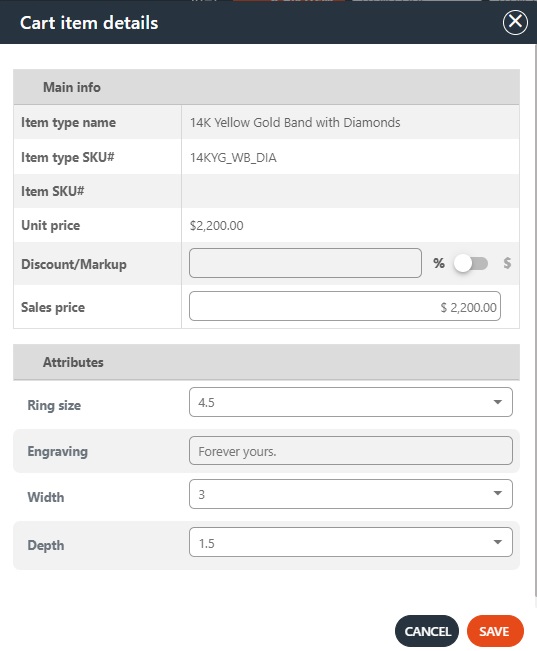
Click on the eye icon to apply a discount or markup to the item. For item types, the attributes can be seen here as well:
The Outgoing consignment will be added to the Consignments submodule list choosing the CONSIGN ITEMS button.
If you have an extensive consignment history, using the filter will make it easier to find the specific order you’re looking for. You can filter by consignment number, status, customer and salesperson. You can also hide the closed consignments from here.
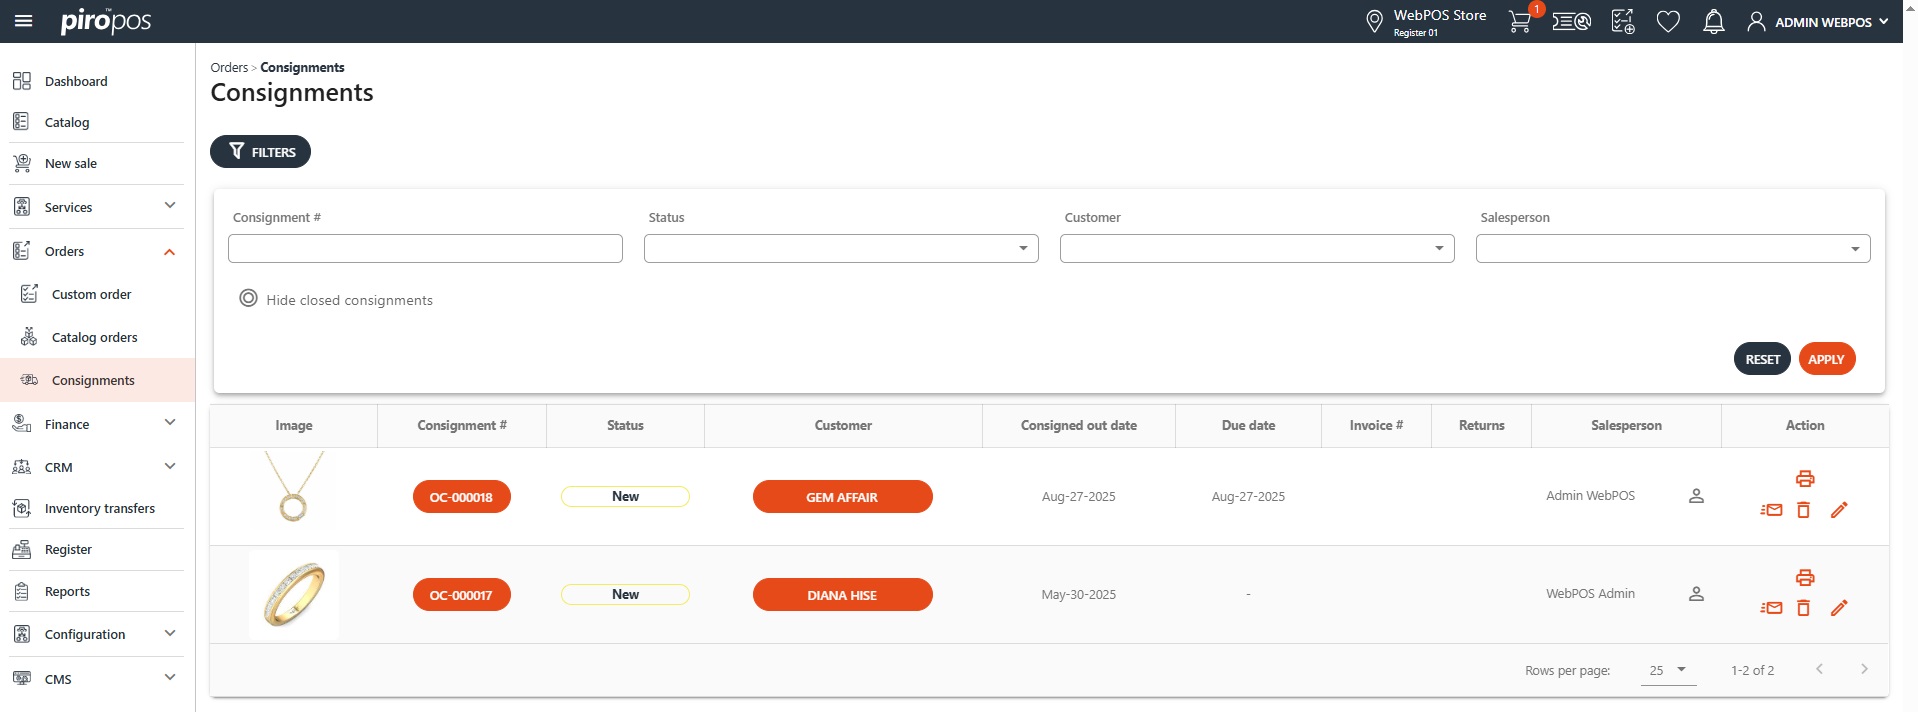
Consignments can be sent by mail, printed, edited or deleted using the icons from their lines’ Actions column.
The visibility of the consignments grid columns can be adjusted in the Configuration module under Admin Settings – Modules. Access to this depends on the user’s permissions. Only users with admin rights can access the Configuration menu:
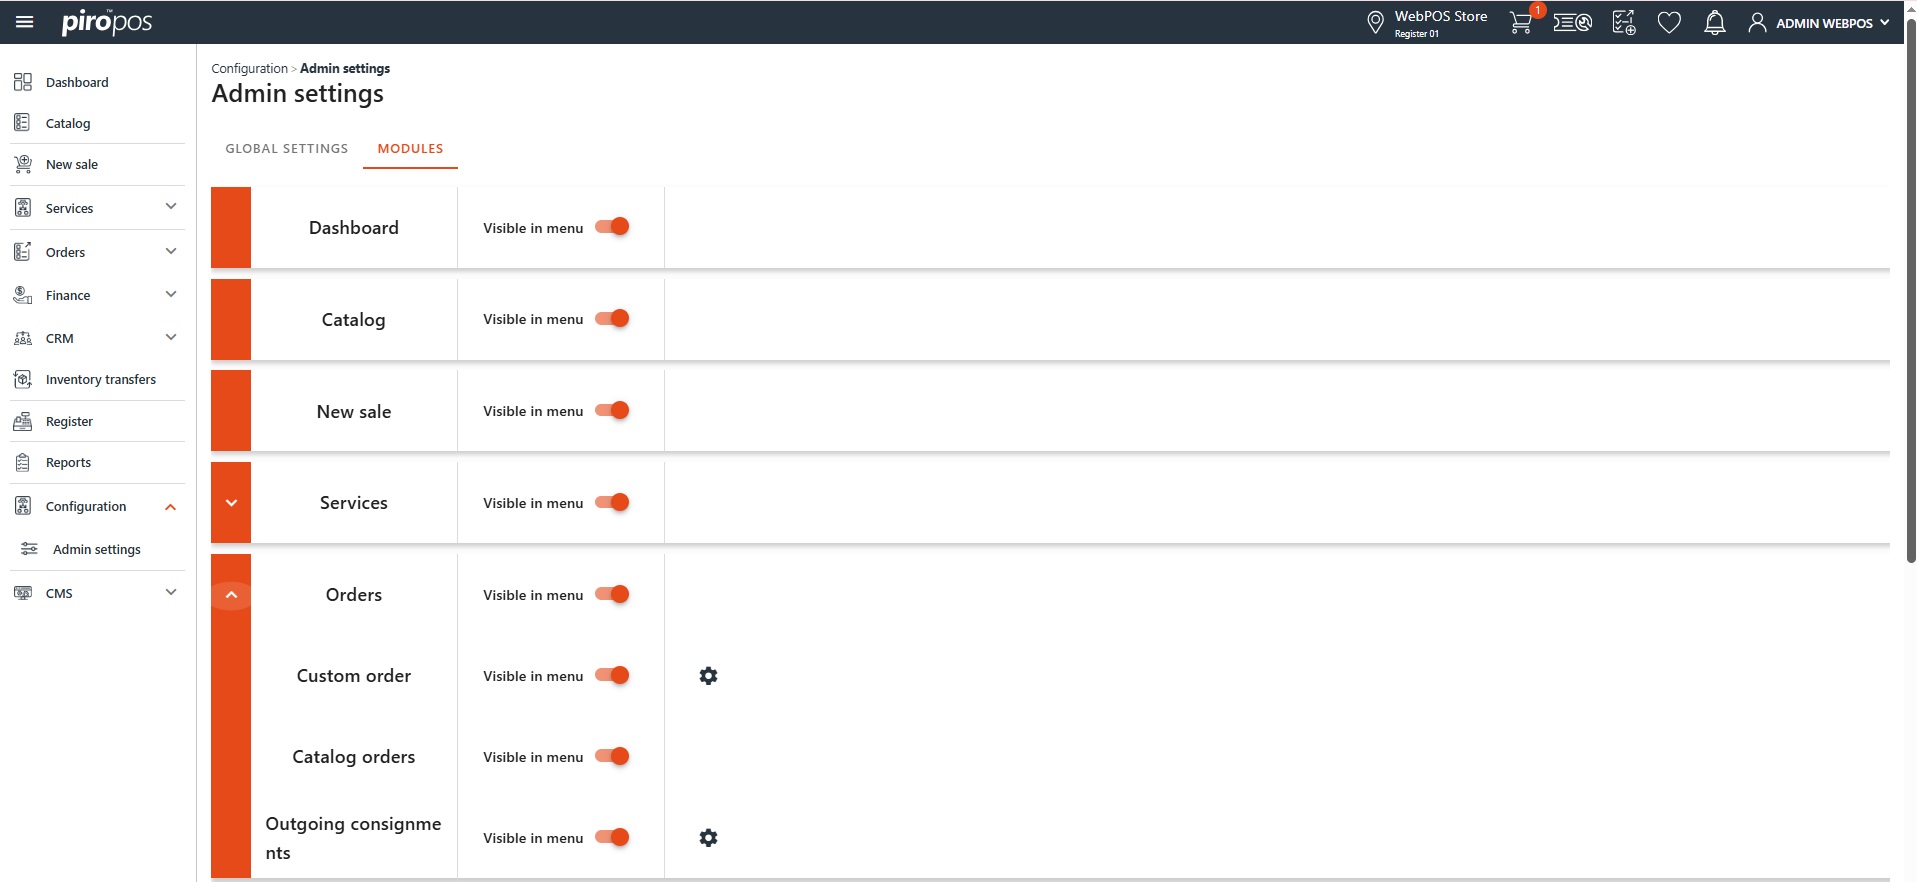
Click the gear icon to open the Settings – Outgoing consignments dialog, where the visibility can be toggled on or off for each column.