
While from a licensing point of view all users are equal, you can choose to activate different roles for your POS users. Some users could have access to all the modules, while others may need to use only a few of them. Our recommendation is to have two types of users in PIRO Retail:
- Web POS admin (e.g., the shop manager)
- Web POS limited users whose activities are primarily related to the sales process (e.g., sales assistants and other salespeople) with limitations
- Web POS user whose activities are primarily related to the sales process (e.g., sales assistants and other salespeople
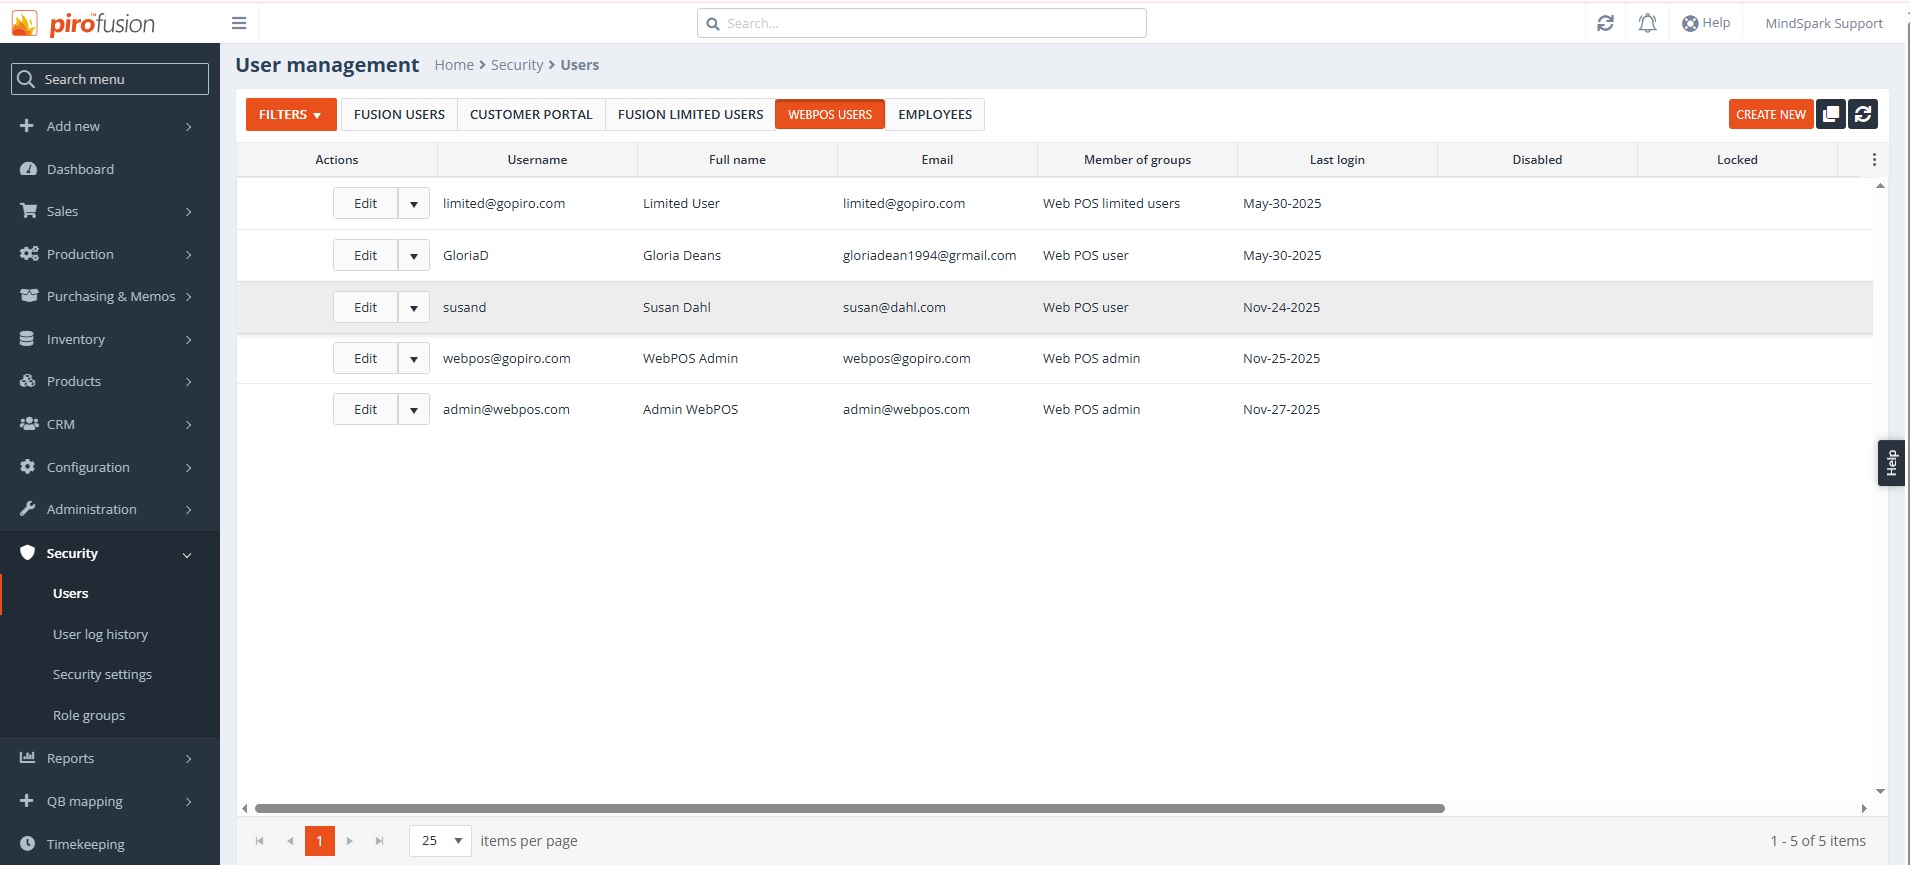
At the module level we can control what different users can view and edit, and this setting is available for all modules. Everything described in this guide assumes that the user has full admin rights in the POS. Users are managed from the back-office system. To set up users who can access PIRO Retail, navigate to the back-office Security module and select the Users submodule. Choose WEBPOS USERS tab then click the Create New button on the User Management page.
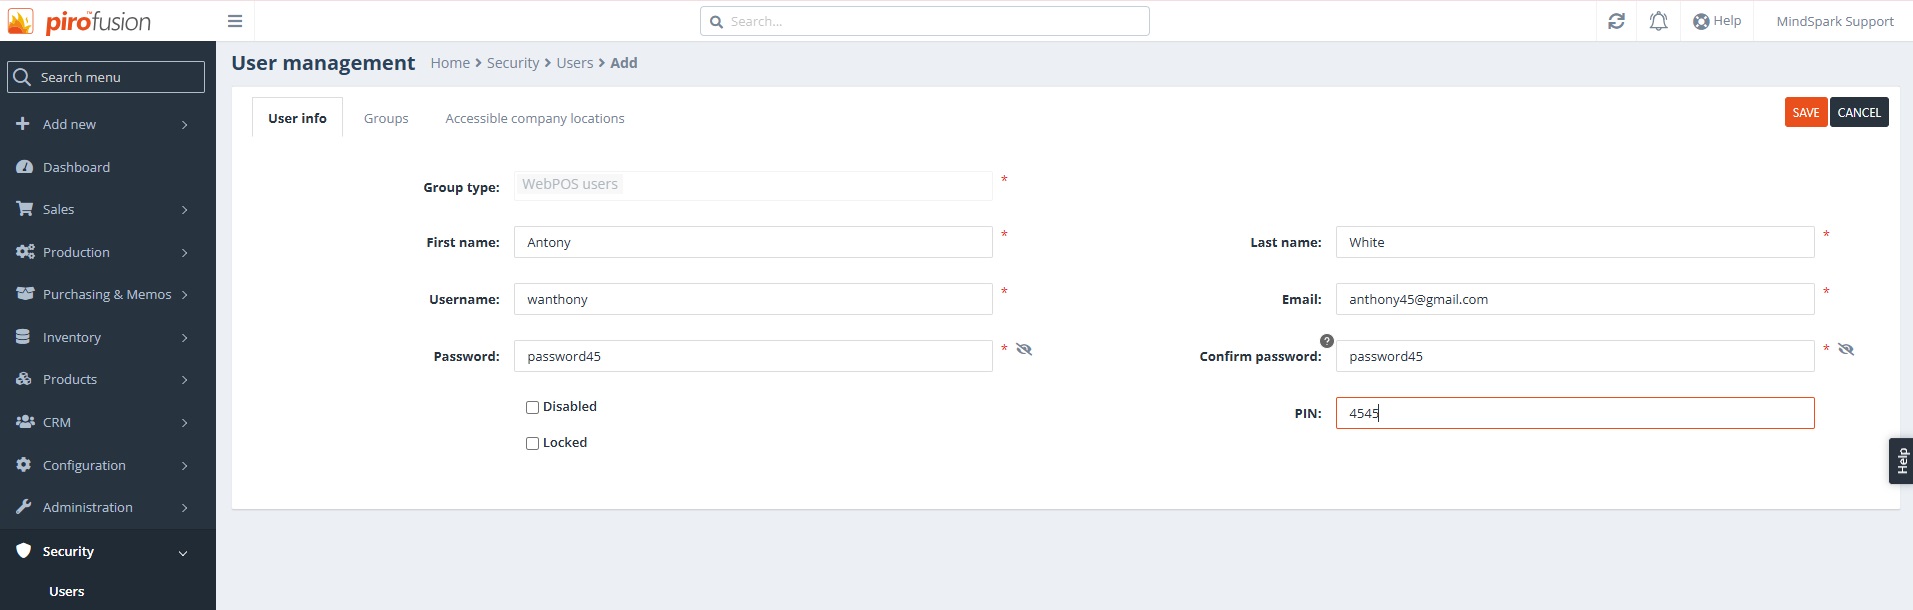
Enter the information about your PIRO Retail users in the first tab of this window – User info. Your users need to have a password and/or a PIN code for signing in to the system. Choose a user group on the second tab:
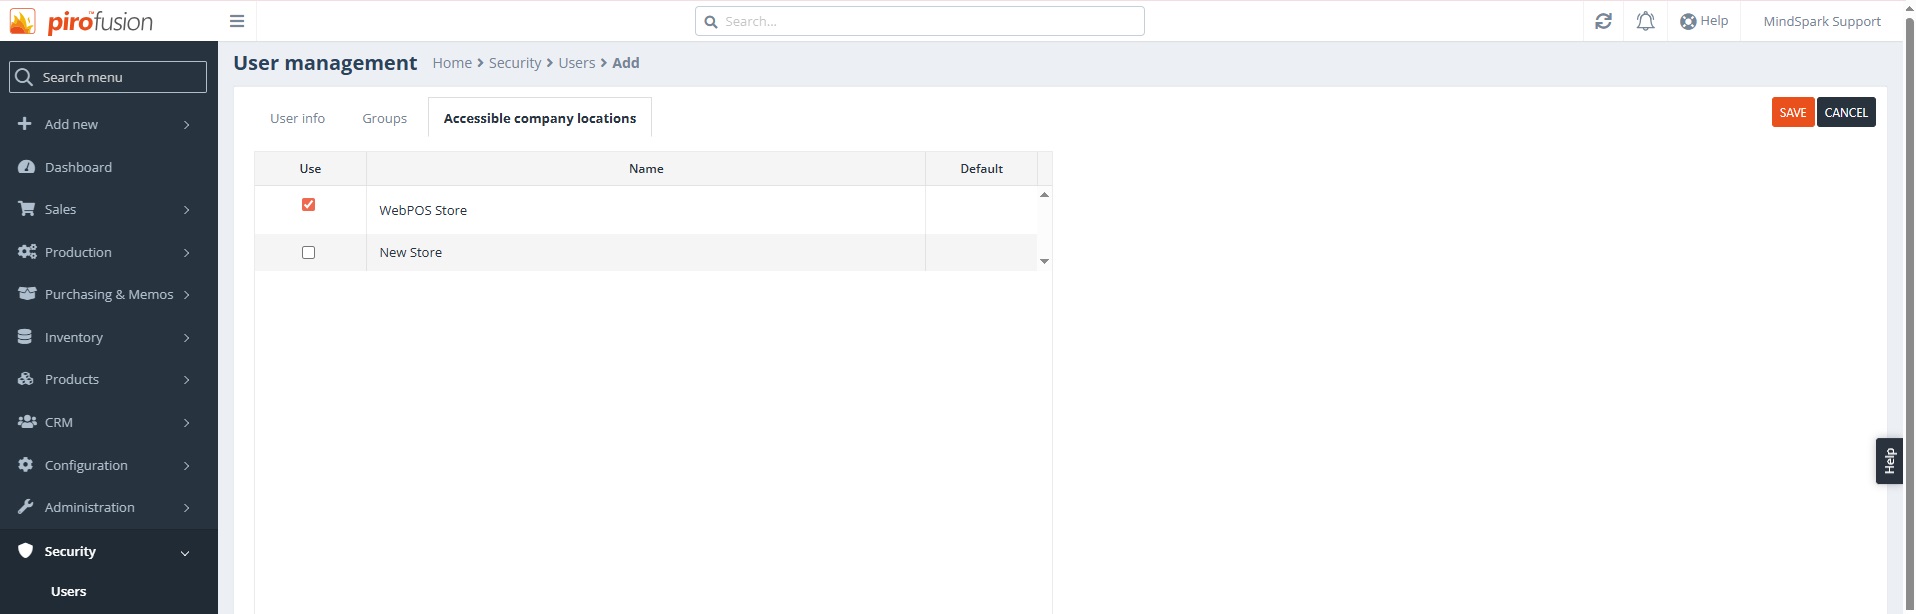
Setting up the Accessible company locations is also an important step. If you have a single company location, simply select the one that appears here (this step is mandatory!).
If you have multiple locations, please select the ones to which the POS users (e.g., sales assistants, shop administrators) will have access. Every time a user logs into the POS, the system will prompt them to select the location in which to log in. If there is only one company location, the POS will not ask the user to select a location.
If you have more than one register in a location, you can easily add additional registers by navigating to Configuration → Inventory settings → Company locations tab. Click the Edit button for the selected location from here: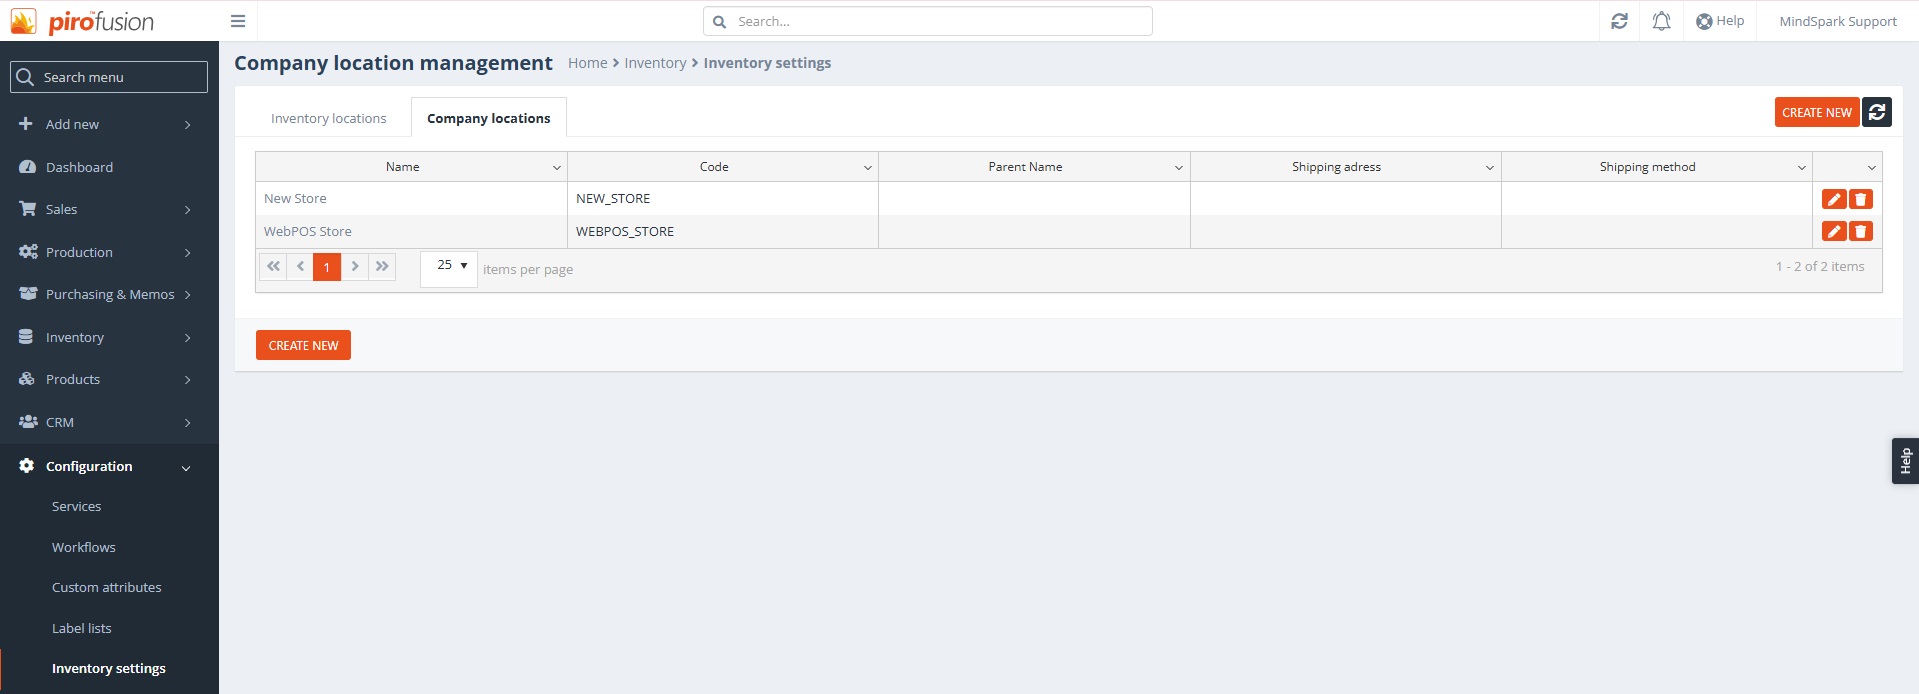
Add the Name and Code for the new register at the end of the Edit Company Location page by clicking the ADD NEW REGISTER button.
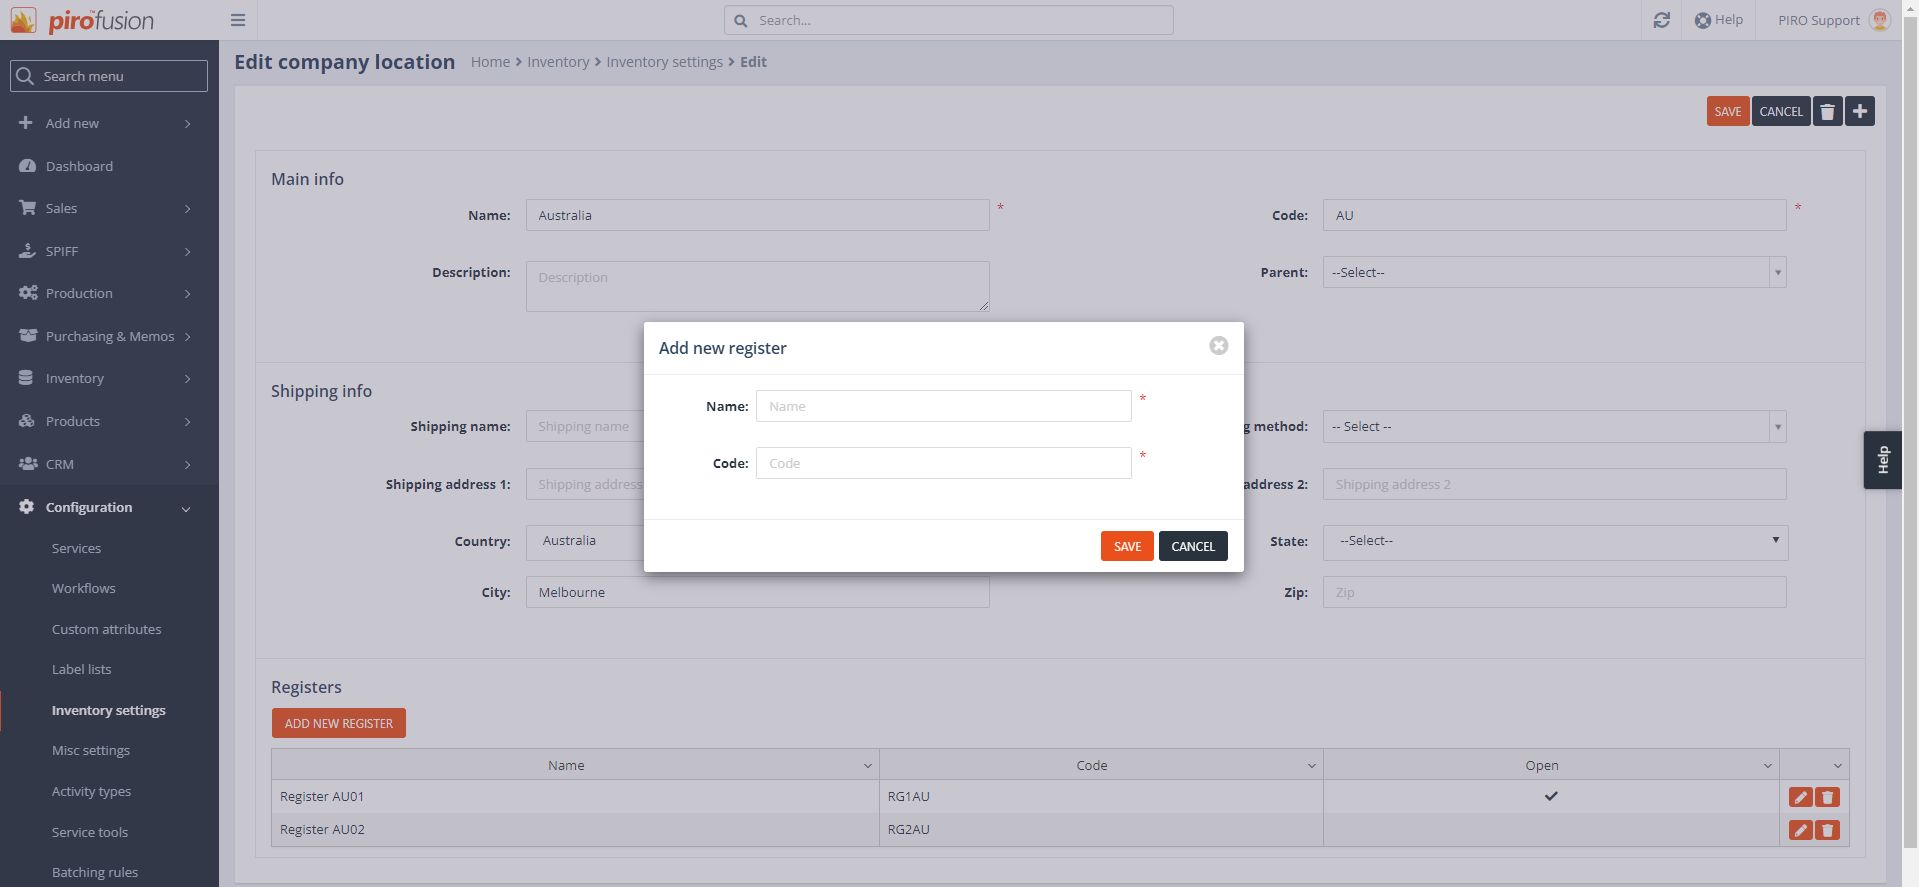
Save the register by clicking the SAVE button. Similar to company locations, if there is more than one register then the system will prompt the user to select a register. If only a single register has been added then it will be selected automatically.