
The product catalog and its products are set up using the back-office system. You can find a detailed description about configuring them in these articles:
Backoffice Configuration – Catalog and Backoffice Configuration – Item Types
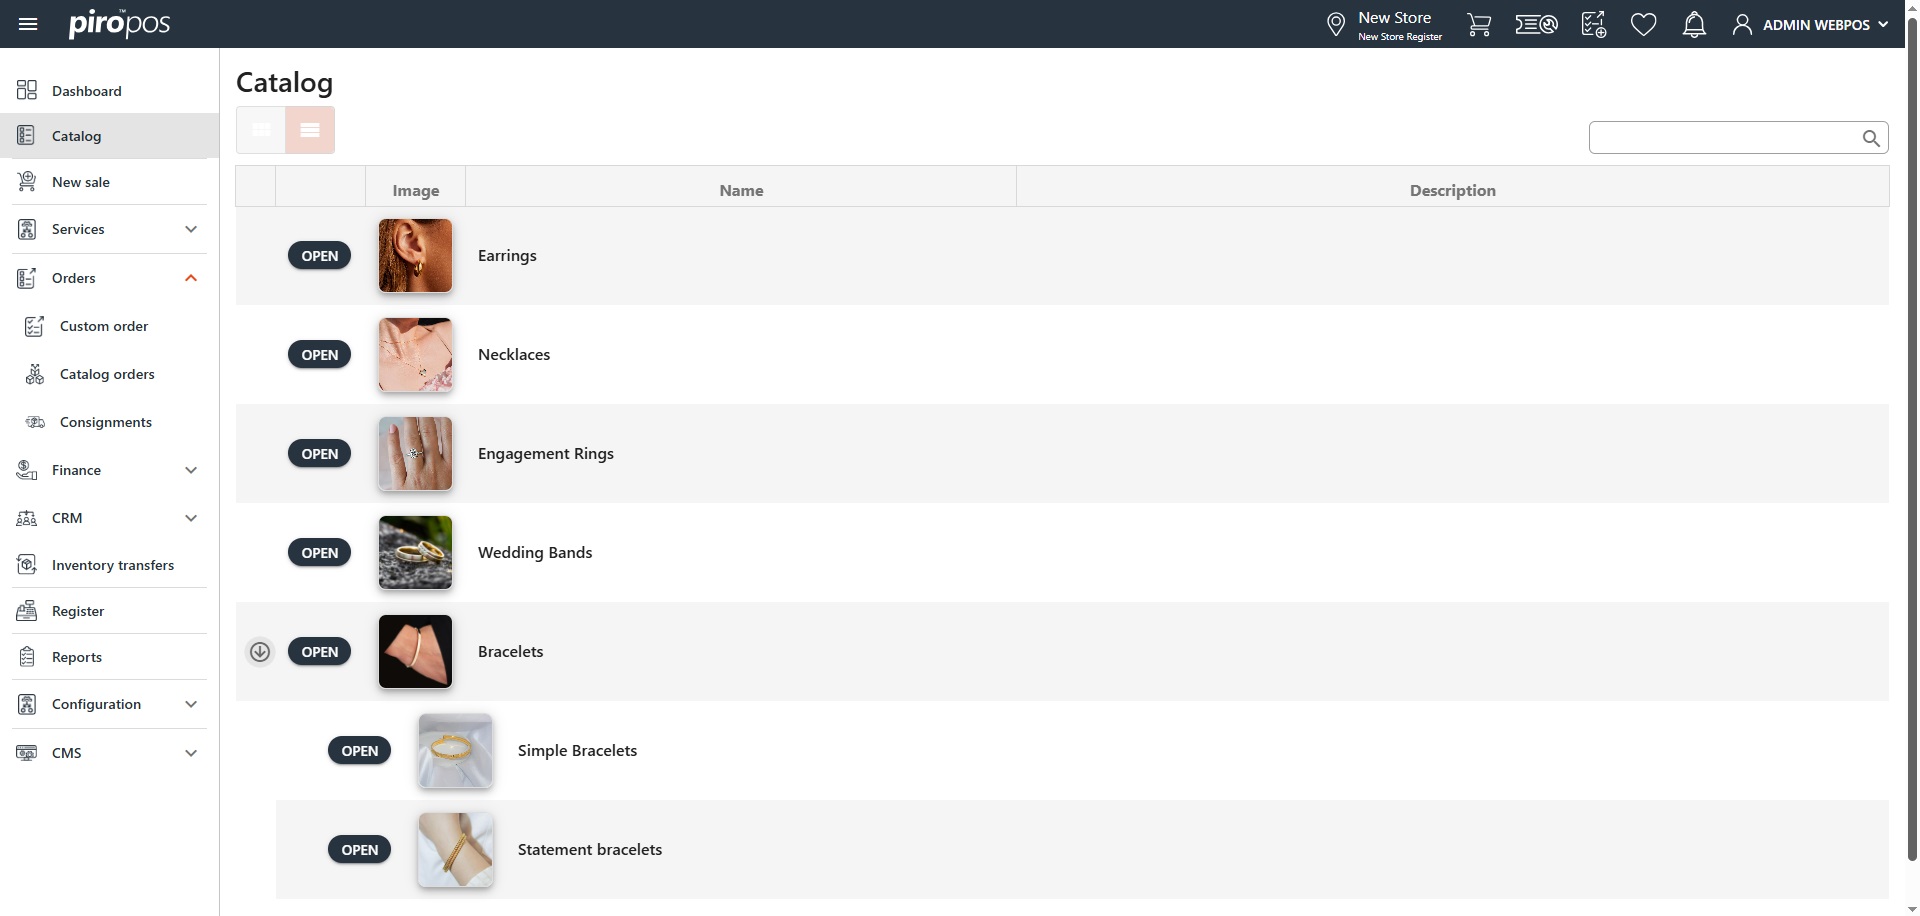
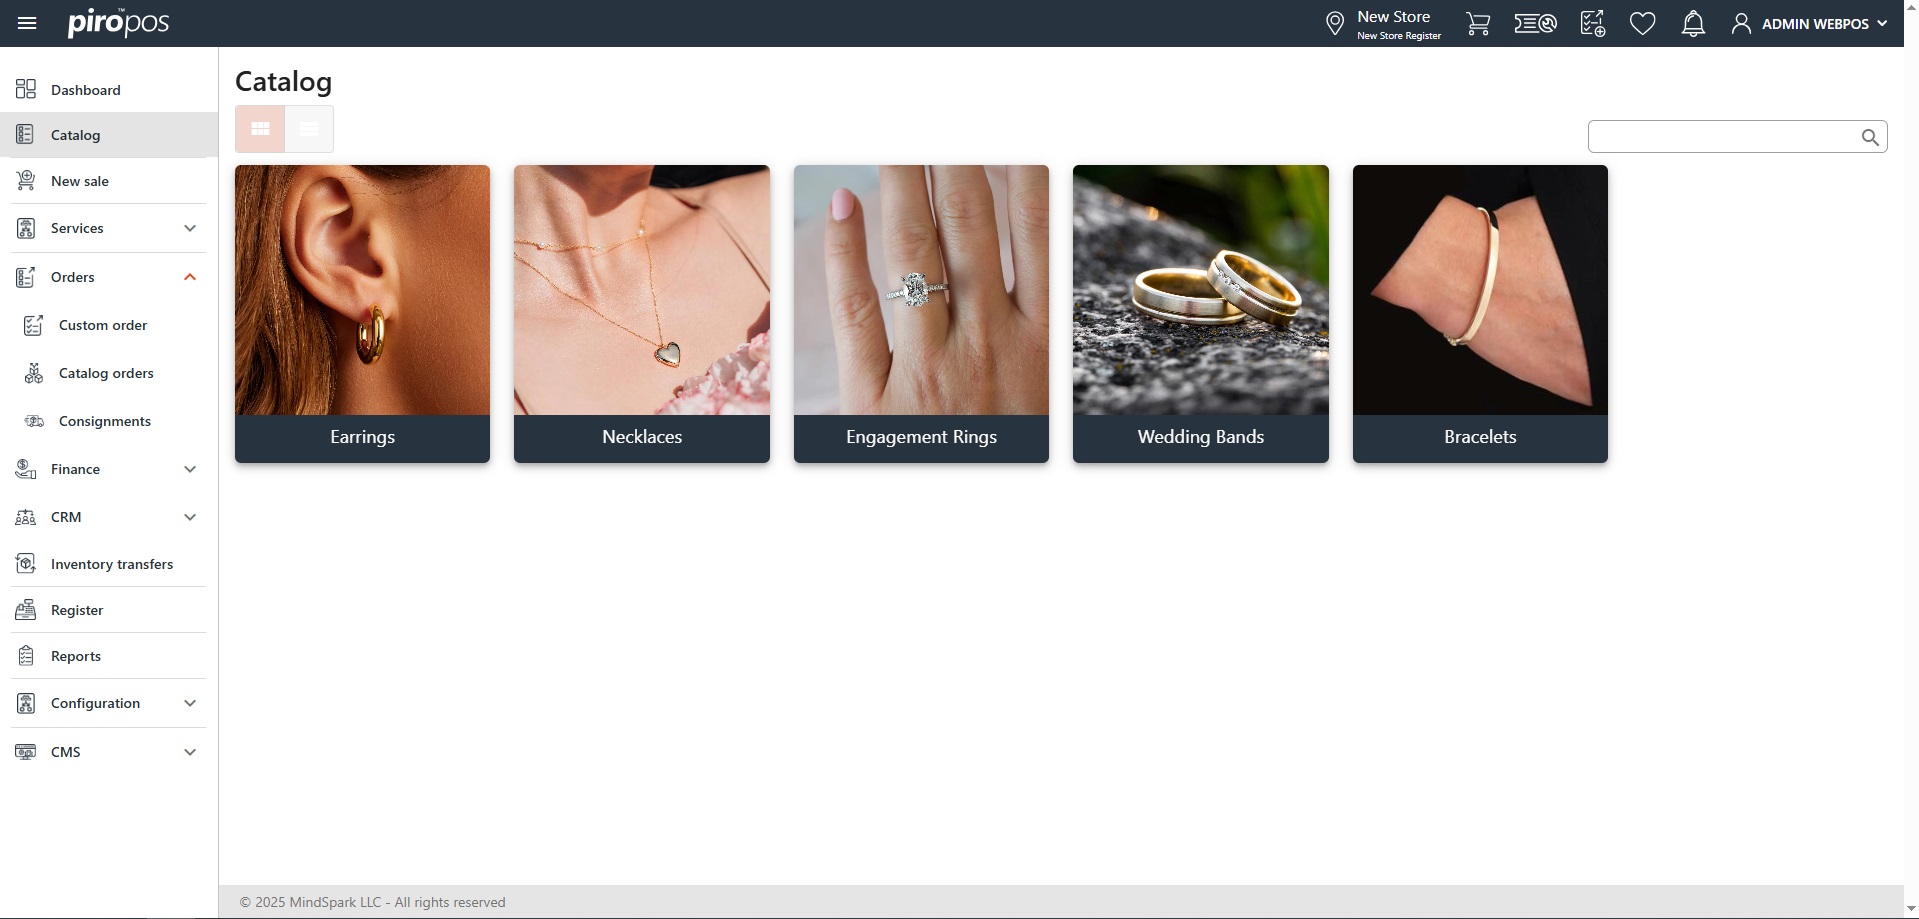
POS users can use the Catalog module for various purposes. Upon entering the module, you’ll notice that there are two view modes: Card view and List view, click the icon of that you would like to use. The global search located above the catalog grid makes it easier to find the product by entering its name or SKU number.
The List view is more convenient if the catalog has subcatalogs:
Use Card view when dealing with various catalog types that include images:
The POS also display inventory items and item types in catalogs. When you navigate to the item level in the Catalog, you will notice two tabs in the header:
- ITEMS ON INVENTORY: the system displays all the inventory items (with SKUs) related to that category. These are ready-made items with fixed components, attributes, and prices.
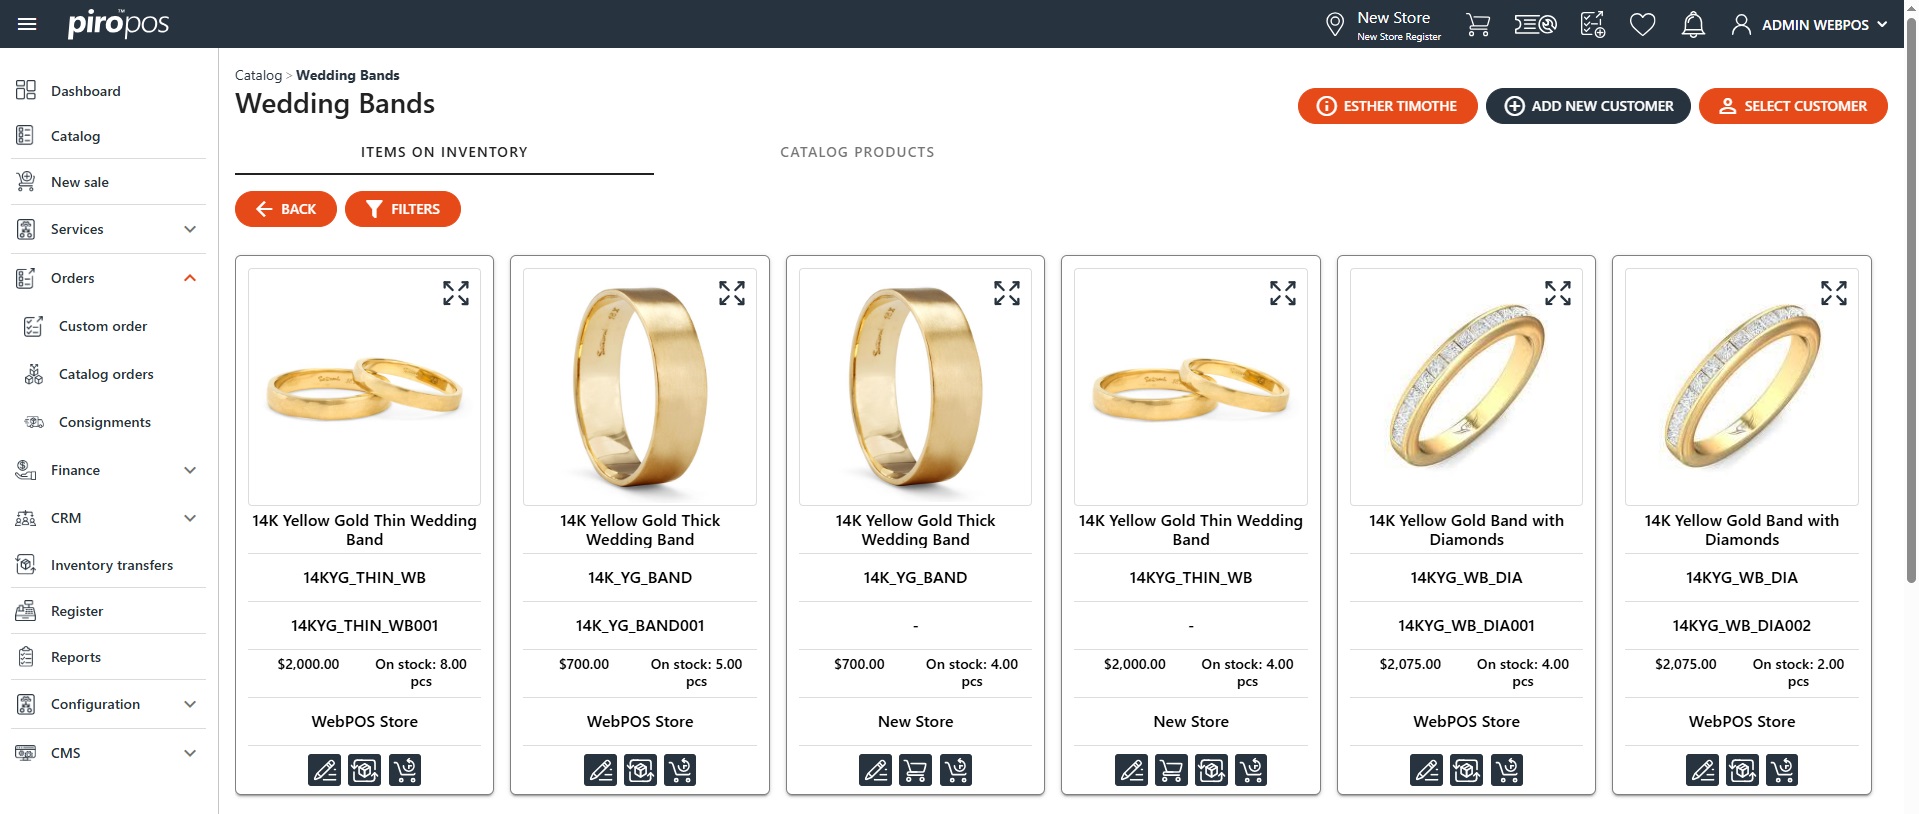
Modify the inventory item using the first icon, request transfer using the second or check its sales history using the third icon from the bottom of the card.
Choose an item by clicking on it. From the detail screen, the item can be saved to the cart with the ADD TO CART or to a layaway with the ADD TO LAYAWAY button. If a customer has already been selected, the product can be added to their wishlist with the ADD TO WISHLIST button and it’s possible to sell it later.
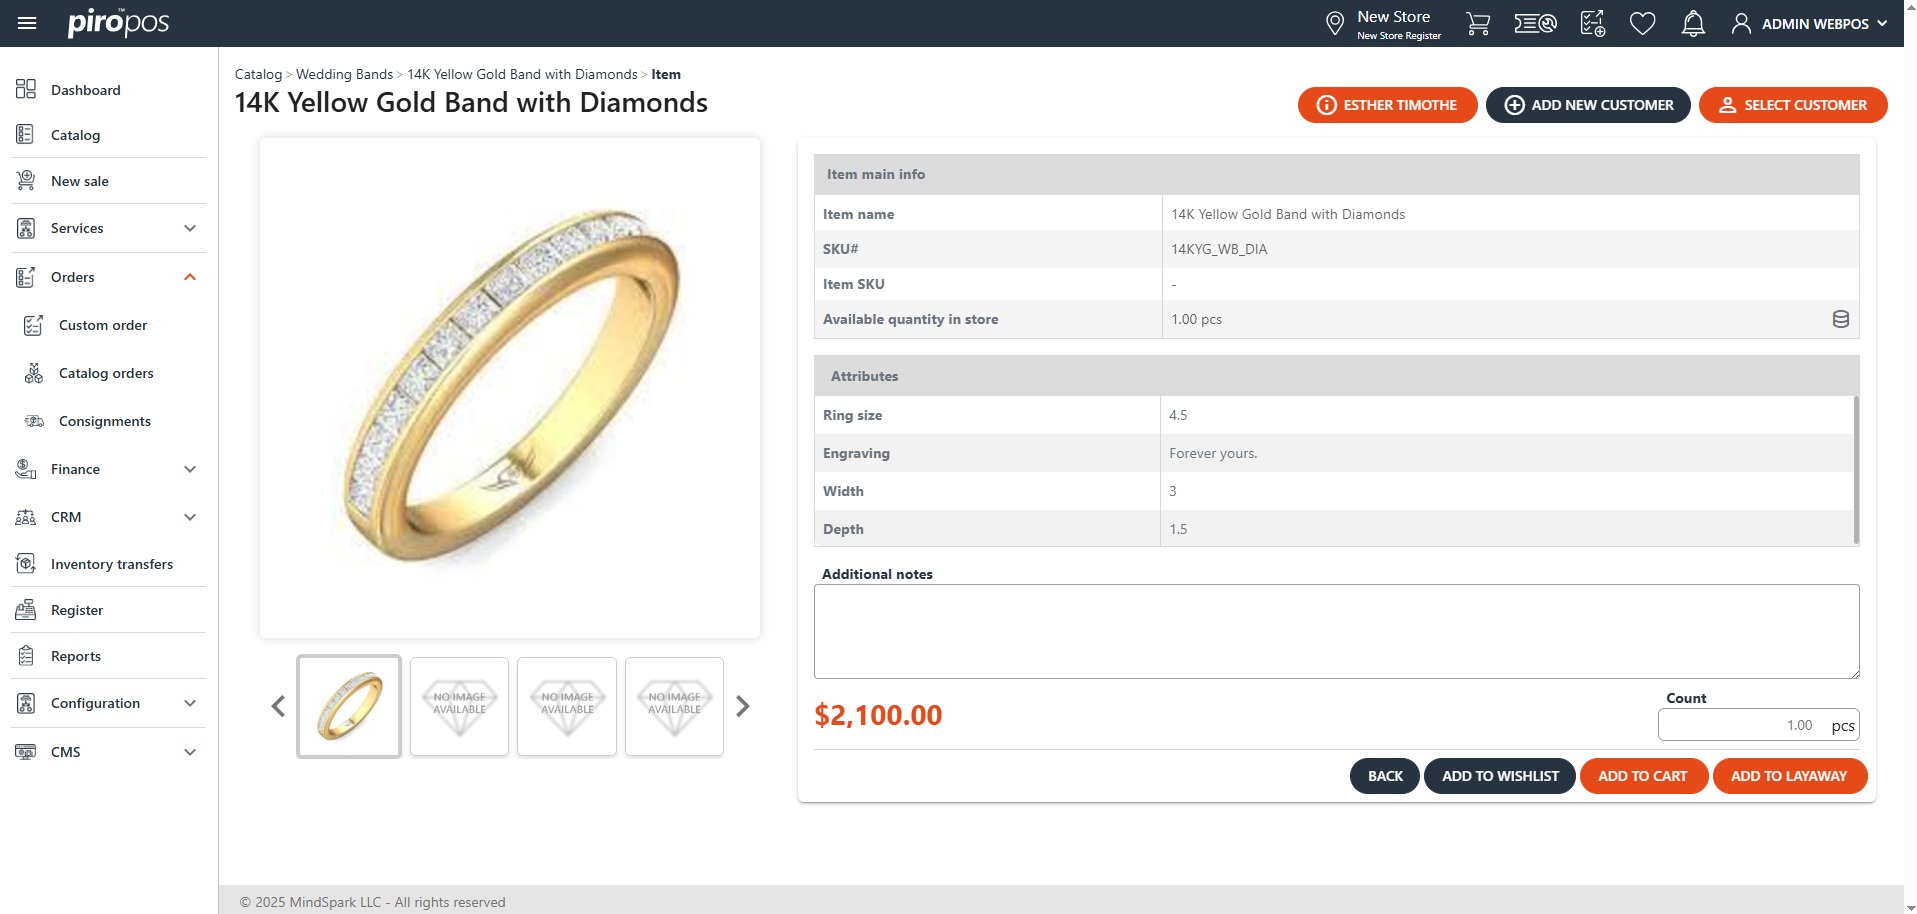
Click the inventory icon on the Available quantity in store line to view the available quantity of the selected product:
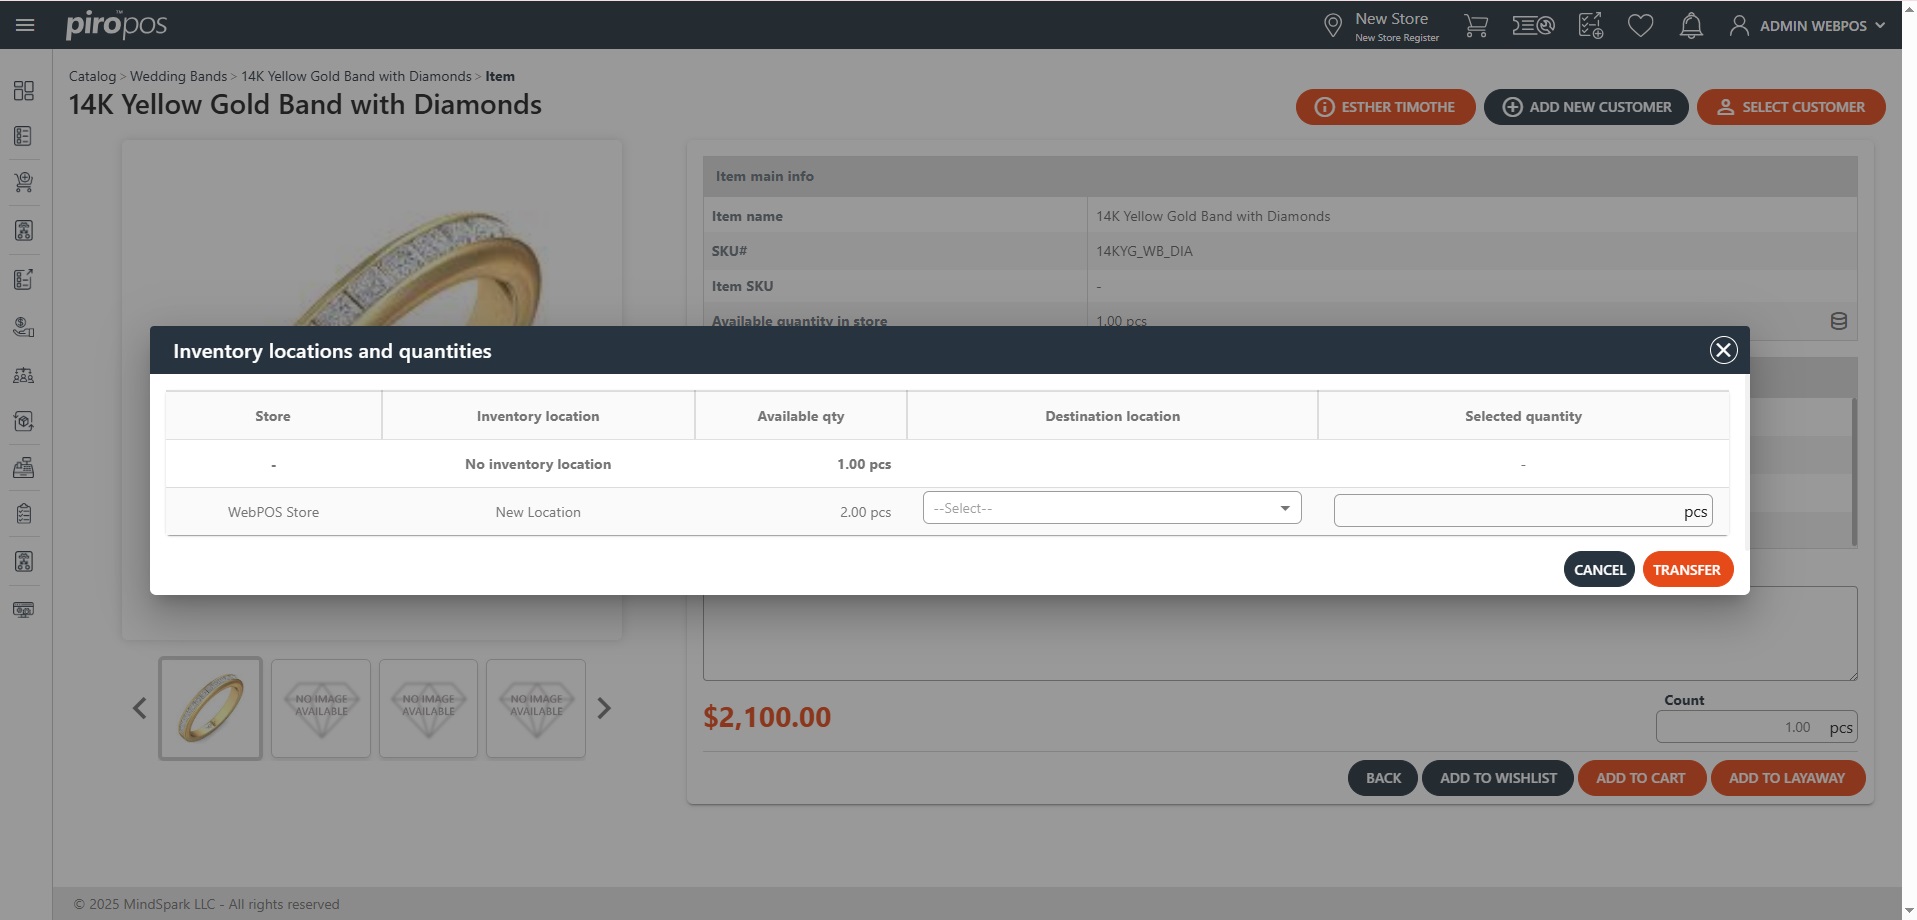
If a store (company location) has multiple inventory locations, all inventory locations and quantities where the selected item exists will be displayed in this dialog. The location with bold letters – including the No inventory location text – indicates that the item is available for sale from that location.
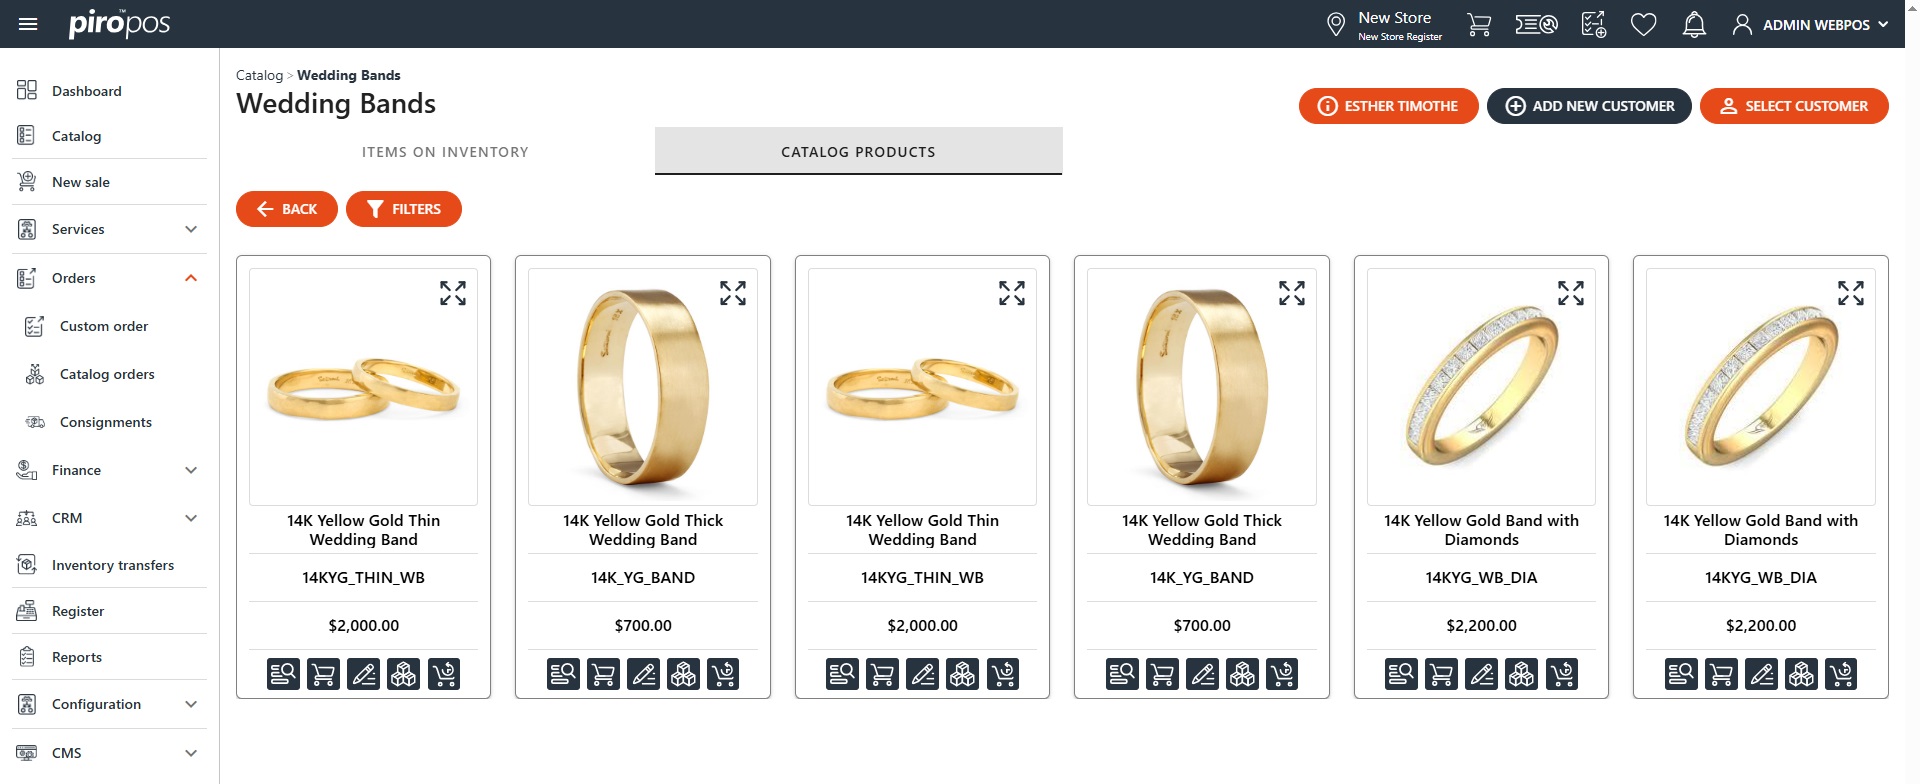
- CATALOG PRODUCTS: this tab shows item types (products) only within that category, the items on inventory will be visible by clicking on one. Every item on inventory will be displayed here as a card depending on their groups’ Inventory item grouping settings.
NOTE: The inventory items’ Inventory item grouping can be set up on the item type’s item group in the backoffice system.
A product detail opens by choosing the first icon, can be added to the cart with the second, can be used for creating a custom order with the third icon. You can check its stock by clicking on the fourth icon or check its sales history using the last icon from the bottom of the card.