
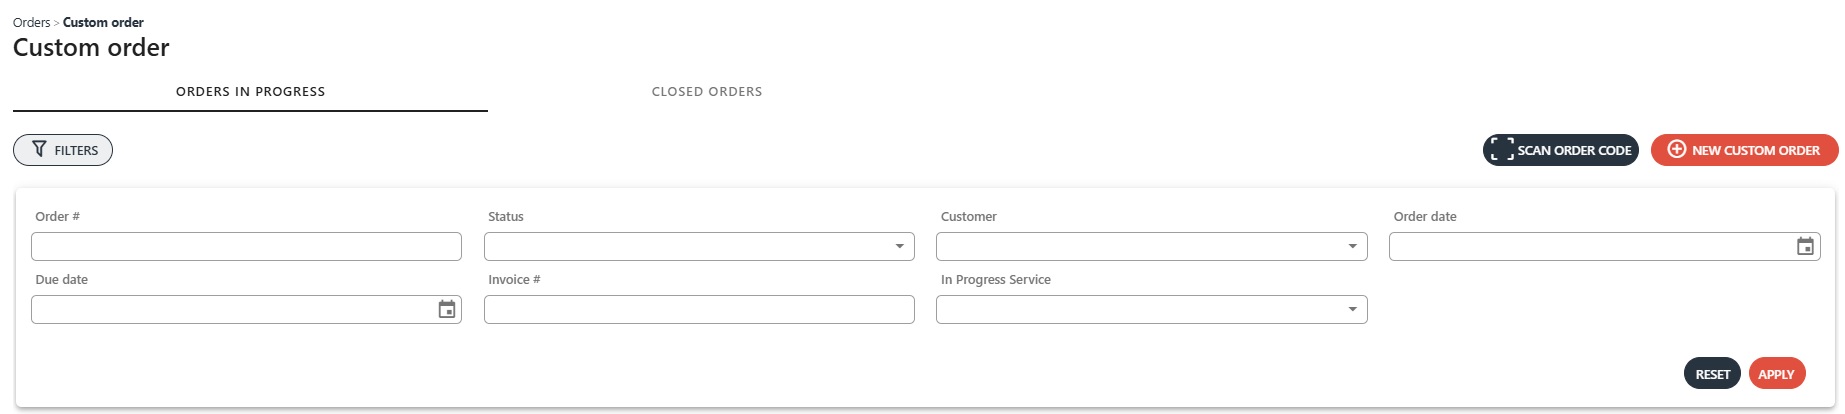
The Orders module displays all existing orders, including both custom and catalog orders. This section focuses on the first submodule, where Custom orders are listed in a grid. If you have an extensive order history, using the filter will make it easier to find the specific order you’re looking for. You can filter by order number, status, customer, order date, due date, invoice number, and in progress service.
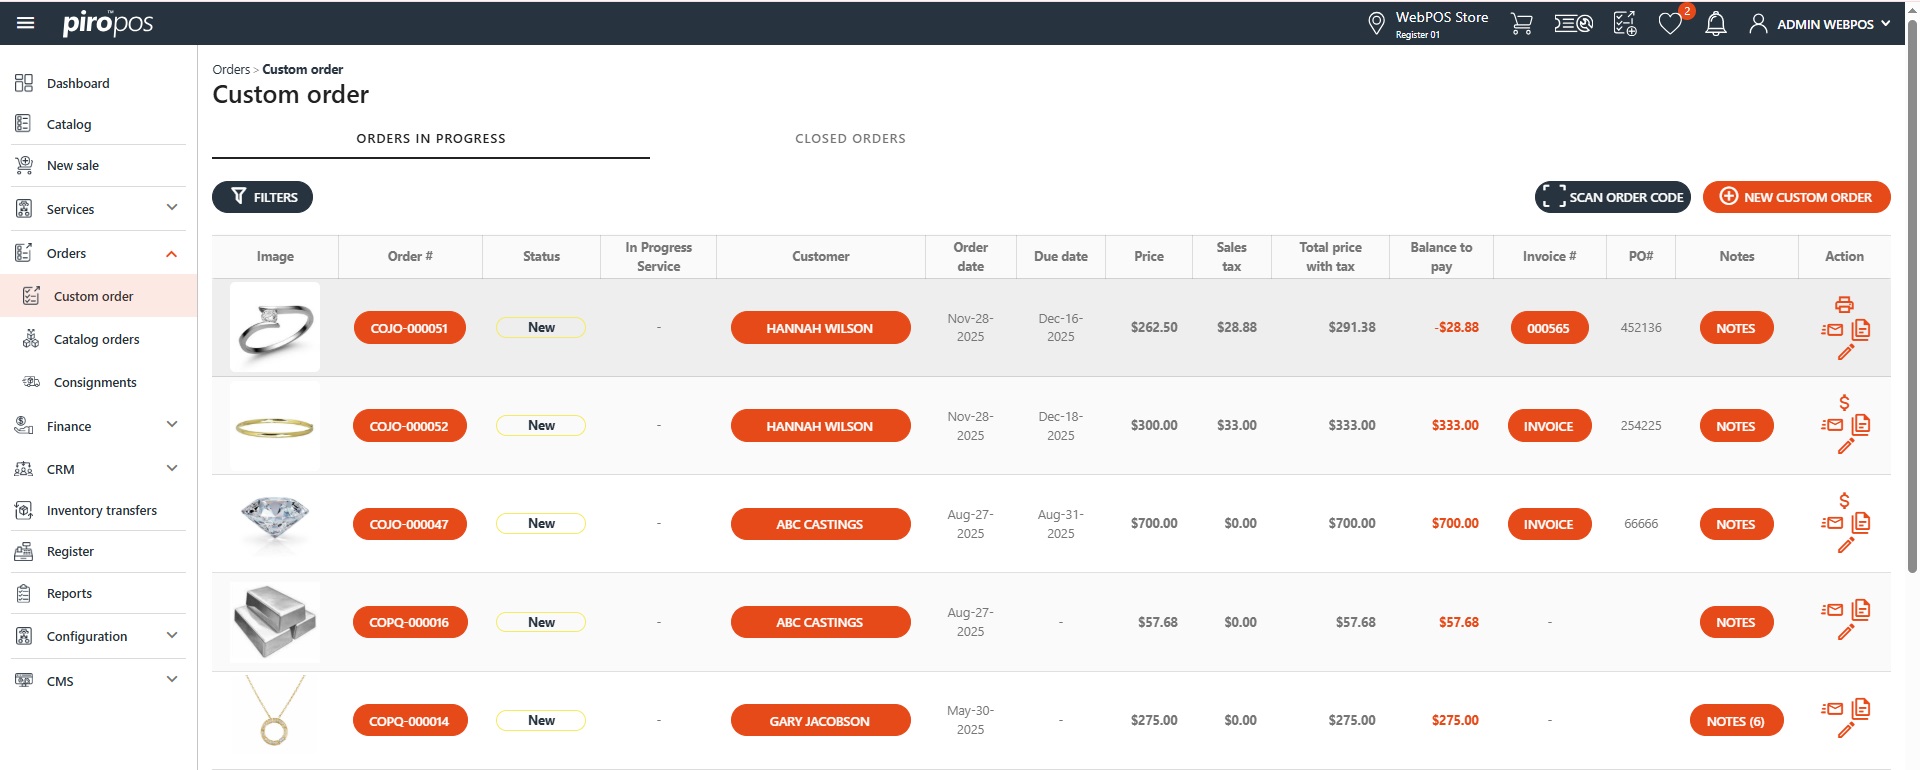
This submodule lets you create custom orders in two different ways: using existing item types from the backoffice system and adding components to them, or by creating a completely new item. Orders created here will be saved and sent as job orders – COJO – or price quotes – COPQ – into the backoffice. A deposit or full payment can be added only for jobs, and both can be emailed from the list below.
The Custom order main page consists of two tabs: ORDERS IN PROGRESS and CLOSED ORDERS.
The first tab shows all orders from the current location that are under preparation, while the second tab lists the closed orders. You can get a detailed view of the orders in progress or the customers by clicking on the order code or customer name.
On the first tab, click the INVOICE button to create an invoice for the custom job order (COJO). You can also make a payment by selecting the dollar icon in the Actions column. From here, you can print the invoice and/or receipts, create a copy, or edit the order. You can also email or copy the custom orders from the both grid.
Note: the e-mail content and attachment is configured in the backoffice Administration module under Auto Emails – WebPOS Order Email.
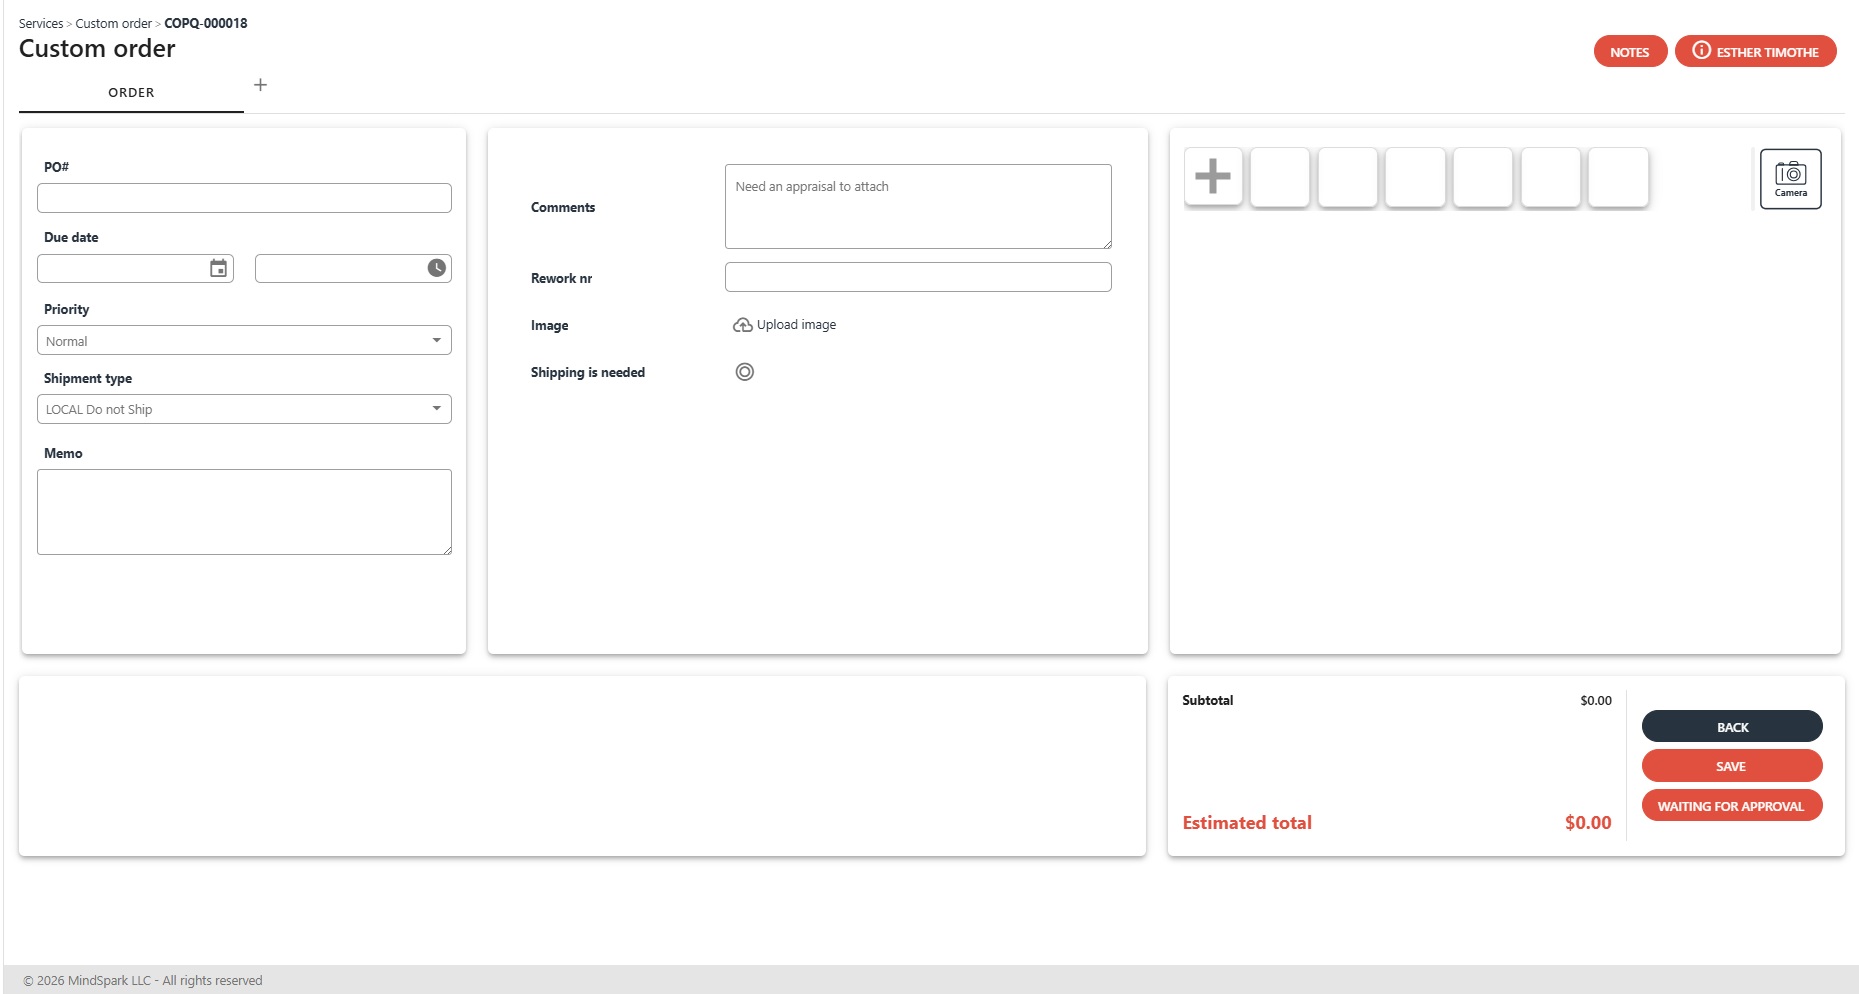
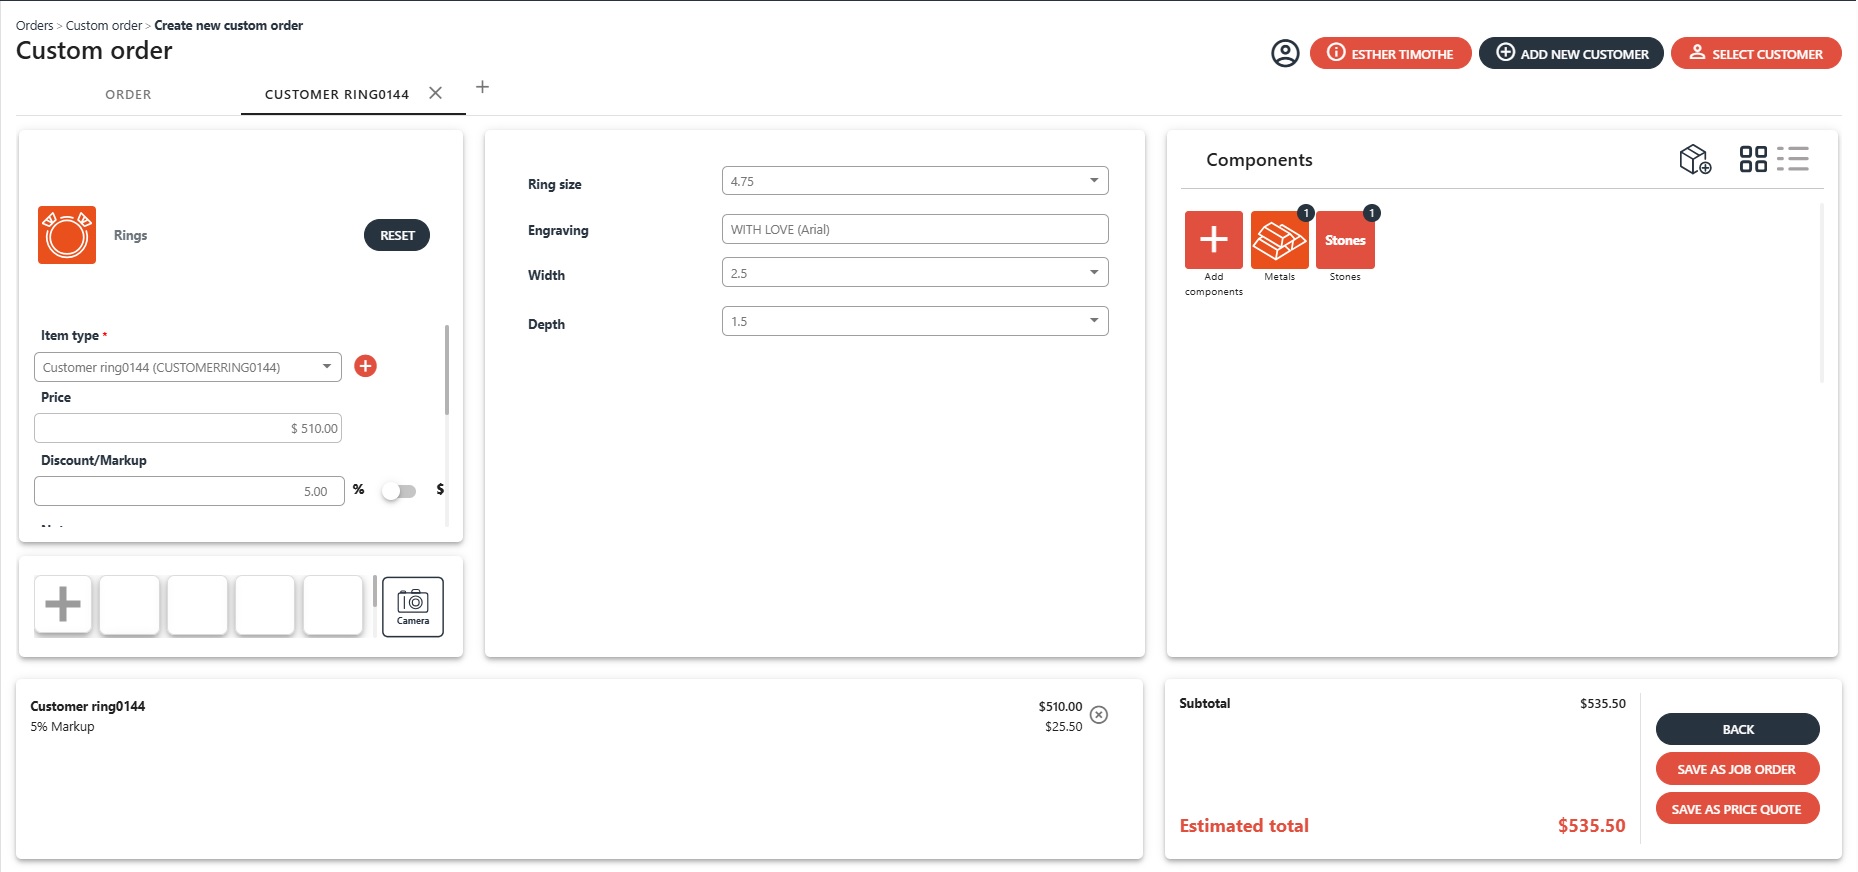
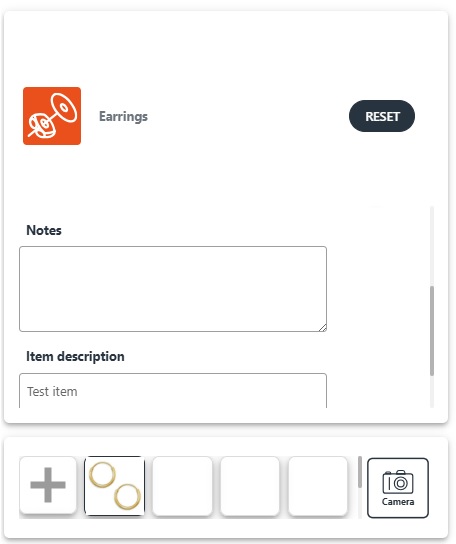
Click the NEW CUSTOM ORDER button above the list, which brings up a new custom order page:
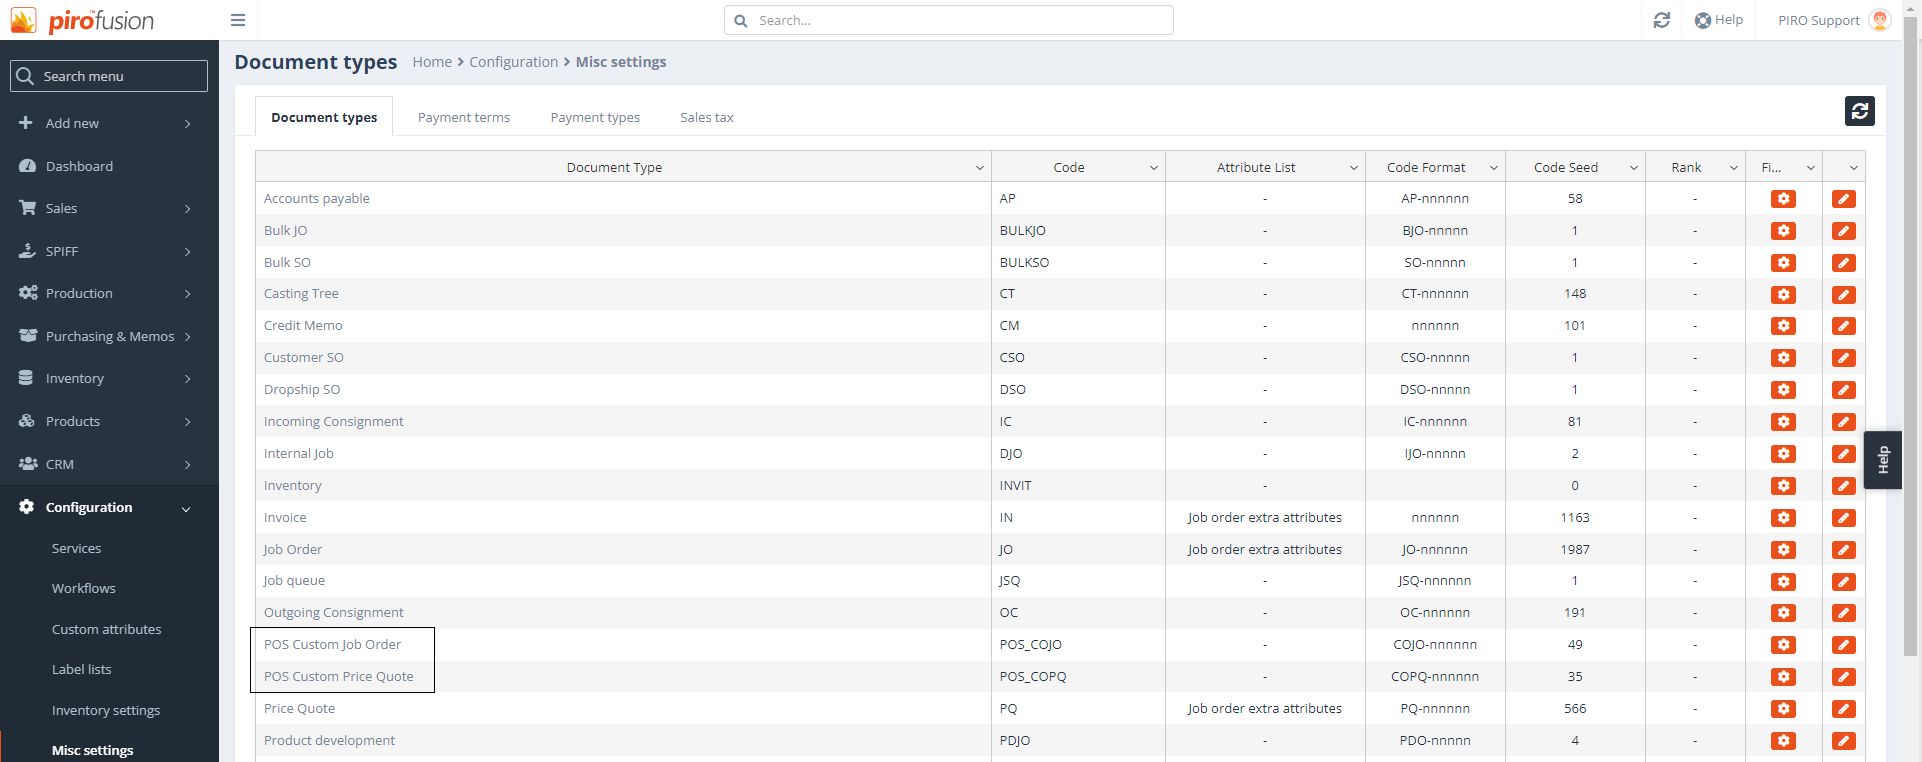
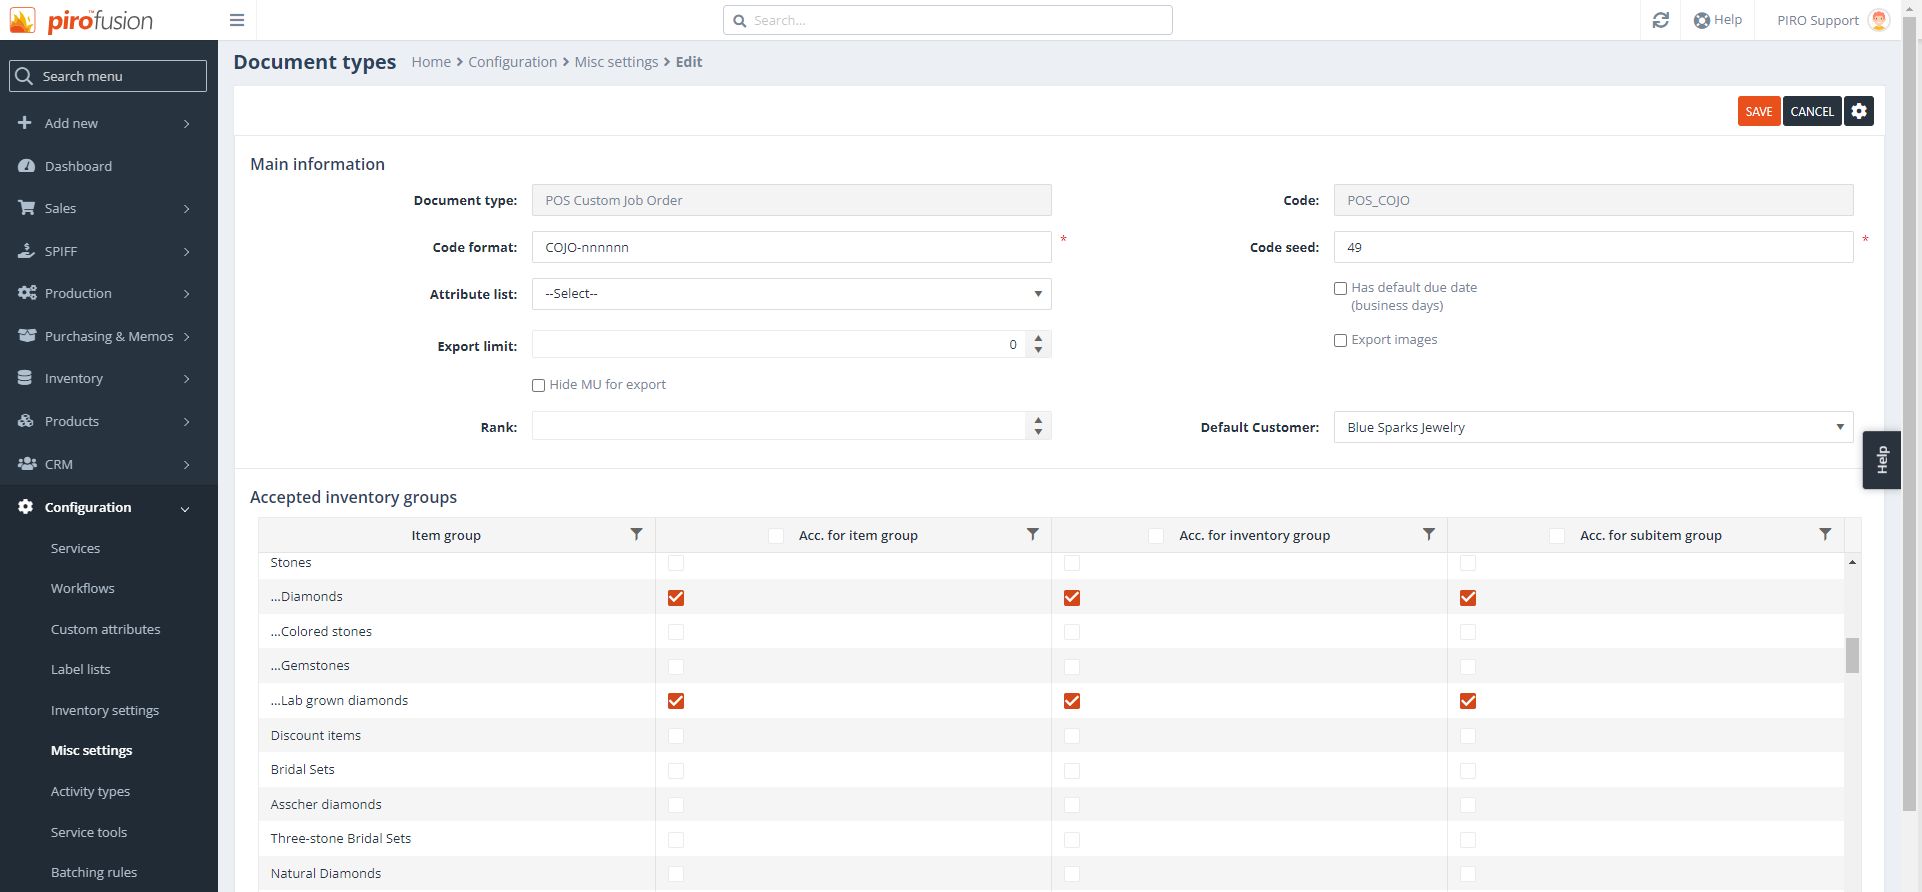
Edit the POS Custom Job Order and POS Custom Price Quote, and enable the item groups in all three columns that will be used for creating POS custom orders:
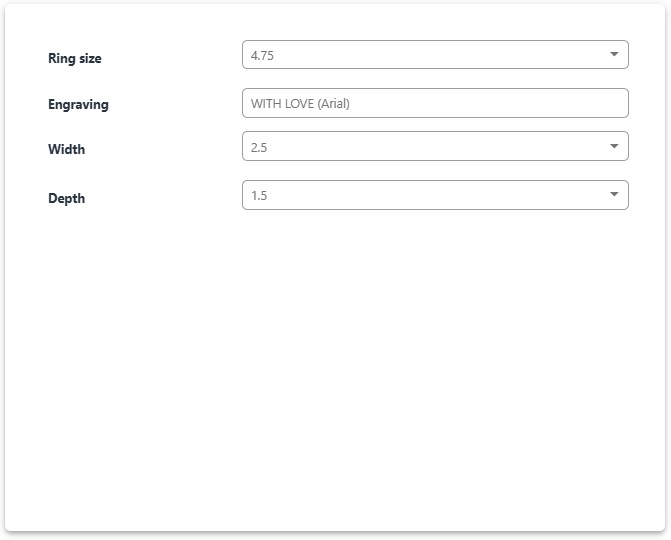
In case the selected item type has predefined attributes, they can be filled in the next panel box:
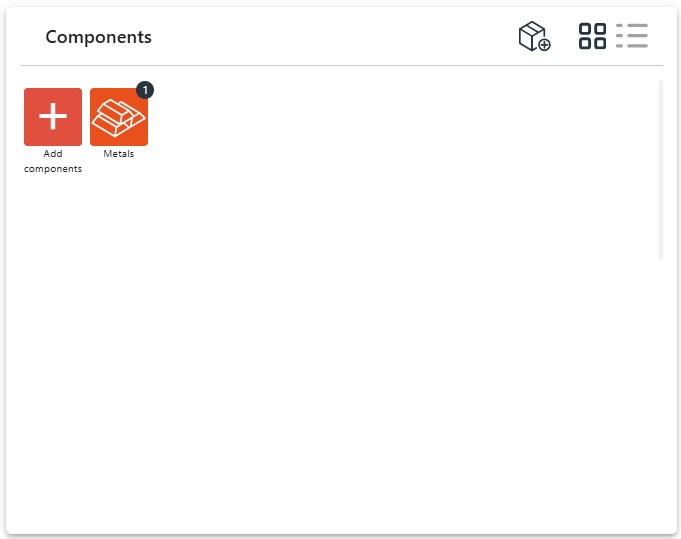
The selected item components appear in the third panel, the small number on the circle indicates its quantity. More components from item types can be added also from here using the button with the add(+) sing on it. Inventory items is also possible to add as components using the cube from the upper right corned of the panel. You can change this “card” type view to list view by clicking on the last icon in header:
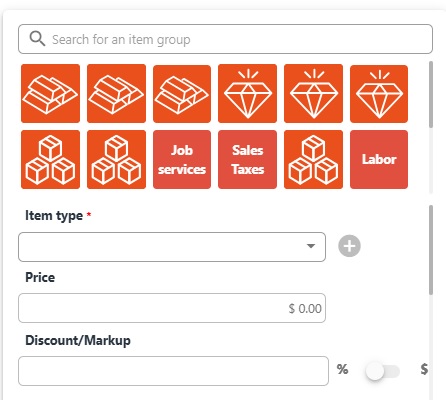
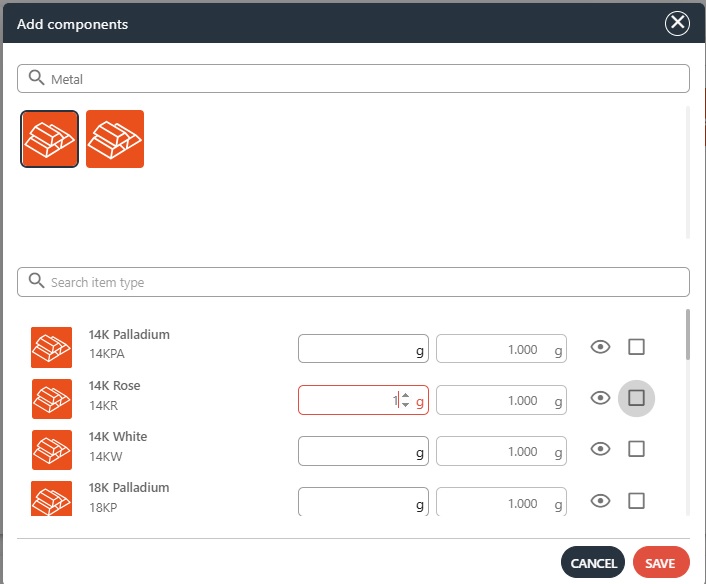
Similar to the adding item to your order you can add components from the Add components dialog: enter the item group name into the first field, then choose the item type from the second list, enter its quantity, view its attributes -using the eye icon next to it – and click on SAVE:
There are two more sections on the custom order page. The right one lists the custom order items and its discounts/markups and the left panel shows the subtotal and total estimated price of the custom item.

At this stage, you can decide how the custom order will be sent into the backoffice: either as a Job Order (COJO) or as a Price Quote (COPQ). The appropriate button can be selected also from this box.
Note: a payment dialog will only appear for a COJO (Custom Job Order), and the payment will be recorded in backoffice as an overpayment for the customer order. The Custom order list also shows that payments can only be accepted for COJO-type orders, not for COPQ-type orders.